


Email validation is a crucial part of any Secure User Registration System. It helps prevent fake user accounts, ensures data accuracy, and is often your first line of defense against spam and bot signups.
In this tutorial, we’ll walk step-by-step through integrating the Mailboxlayer Email Validation API into a React-based user registration system. By the end, you’ll have a working registration flow that validates emails in real-time, ensuring only legitimate users make it into your database.
Table of Contents
You Will Learn
- How to set up a basic React app for form-based user input.
- How to make HTTP requests using JavaScript’s fetch() function.
- How to send an email address to the Mailboxlayer Email Validation API for verification.
- How to check API response fields like MX records, SMTP check, and quality score.
- How to display real-time validation feedback (success or error messages) to the user.
- How to use state management in React to capture and process form inputs.
- Best practices for email validation during user signup to prevent fake or disposable accounts.
What is Email Validation?
Email validation is the process of ensuring that the email a user provides at signup is properly formatted, and can receive emails. If your business plans to use email addresses for signup, or send promotions via email, it’s crucial that the emails in your database are valid.
Regex Email Validation
It’s easy to check an email’s syntax against a Regex pattern, however, email validation using regular expressions has several pitfalls. It will only tell you if the email is properly formatted, not whether it is active. It’s also difficult to create a Regex pattern that accurately captures all possible email formats.
Validation APIs
To properly validate an email address, it’s best to use an email validation API. An email validation API not only checks the syntax, but also whether the address is a temporary address, a free address, a known spam account, a catch-all email address, a role-based address, and whether things like SMTP and MX records are properly set up.
This JavaScript email validation tutorial assumes you’re comfortable working with React and making HTTP requests. If you’re new to React, check out the official React documentation. For the API calls in this tutorial, we’ll use JavaScript’s built-in fetch() method to interact with the Mailboxlayer API and retrieve email validation results.
You’ll need to have Node installed. This can be done using the Homebrew package manager. After installing, you can check your version of Node using the following command:
$ node -v
Step One: Getting Started With the Mailboxlayer API
The Mailboxlayer API is a simple REST-based JSON API that verifies incoming emails. In addition to checking syntax, MX records, and SMTP configuration, the API also validates the address against a continuously updated database of known free, catch-all, spam, and disposable email providers.
Signing Up
Mailboxlayer offers a free tier that allows up to 100 requests per month. This is plenty for our tutorial implementing email verification in web applications. Head to the Mailboxlayer Sign Up Page to sign up for a free account.
Get Your
Free
Email Validation API Key!
Mailboxlayer
Join thousands of developers using Mailboxlayer for email validation & verification!
Get Your Free API Key!100 Requests Free!
After signup, you’ll be taken to your dashboard, where you’ll see your email API access key, statistics on monthly usage, and links to a quickstart guide and documentation. Make a note of your access key, and take a look at the documentation for an overview of the endpoint we’ll use.

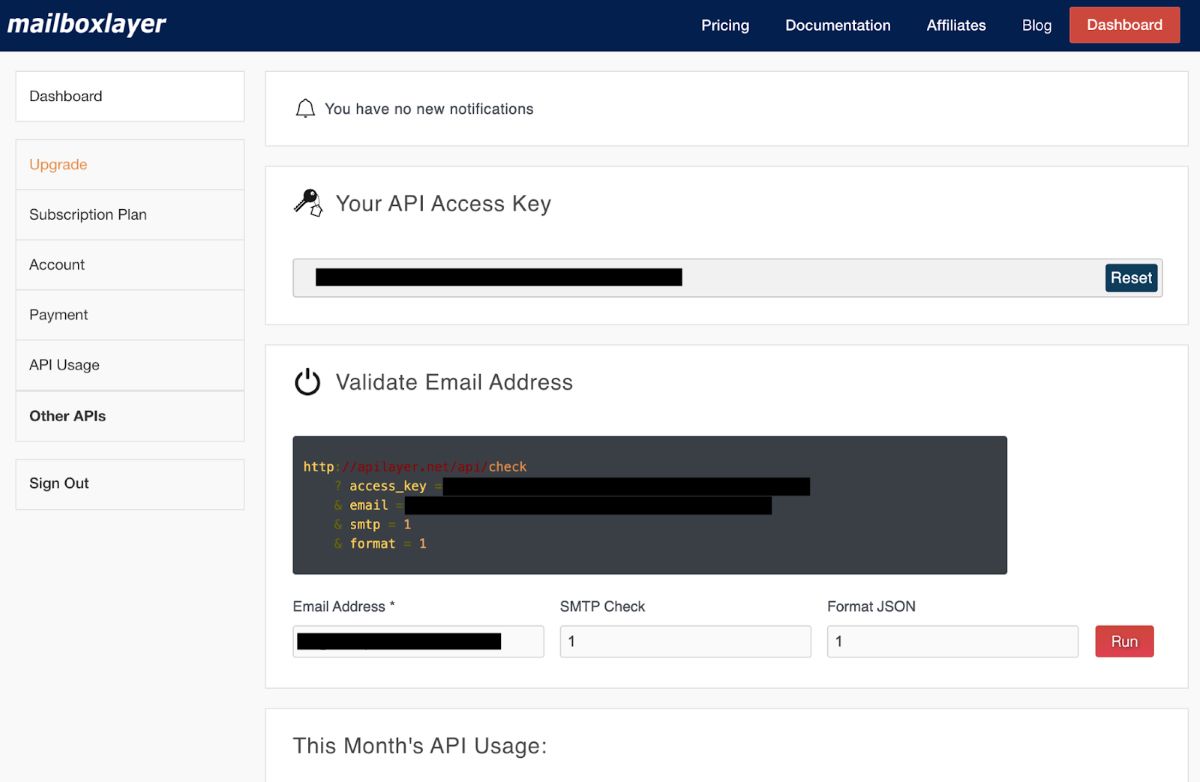
Endpoint
The Mailboxlayer API has just one endpoint, which performs all the necessary checks, based on the parameters you provide. The only thing needed to perform a check is your access key and the email you want to validate. A complete list of optional additional parameters can be viewed on the documentation page.
The base URL for the API is:
https://apilayer.net/api/check
Step Two: Getting Started With React
Create React App is a React framework that lets you get up and running quickly without having to configure Webpack or other dependencies. Check out the Create React App documentation for a detailed explanation of the framework, or follow the quick start below.
Installing Dependencies
Check that you have Node>=14 installed on your dev machine, and npm version 5.2 or higher. Use npx to install Create React App and spin up the app in one command:
$ npx create react-app email-validation-app
You’ll be walked through a quick setup wizard. Once you’ve finished, you can start the app by running:
					$ cd email-validation-app
$ npm start
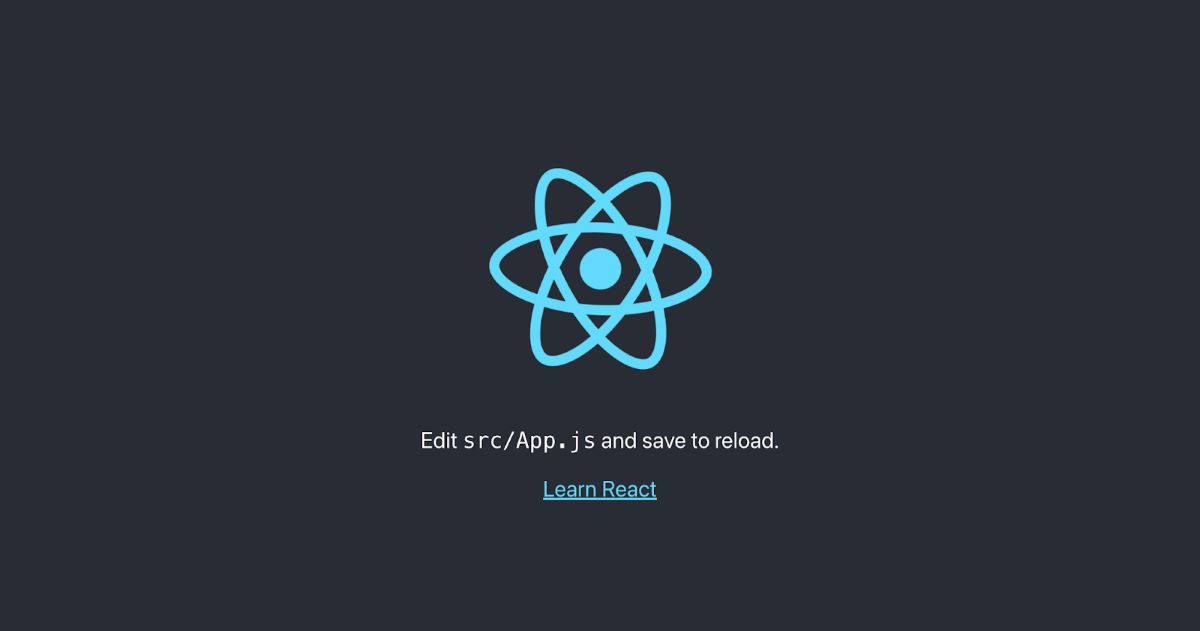
Head to localhost:3000 in your browser to make sure it’s working. You should see the following boilerplate, provided by Create React App:

For this email API validation Nodejs tutorial, we’ll build directly in the app’s main file: App.js. Open the file in your preferred code editor and delete everything between the two
Create a Mock Dotenv File
We won’t be deploying the app as part of this email validation tutorial, however, getting into the habit of managing your environment variables is best practice for a production application, where you should always put sensitive strings into an environment file. For now, we’ll mock out a real dotenv file by creating an environment.js file and pasting our access key and URL into it.
Your environment file contents should look something like this:
					export const ACCESS_KEY = “YOUR ACCESS KEY”
export const API_URL = “https://apilayer.net/api/check”
Step Three: Sending the API Request
Before we build our UI, let’s make sure the API is returning what we expect. You can send a test request from the API documentation page, where you can also find email verification code examples in multiple languages. The Javascript code example provided is forJQuery, so let’s write our own API request using the more modern Fetch.
Query the API
Write a function called verifyEmail that sends a request to the endpoint, with the access key and email to verify attached as query parameters.
For more on using async functions with useEffect, check here.
					import { useEffect } from 'react';
import { ACCESS_KEY, API_URL } from './environment';
const EMAIL = “your@email.com”;


...


 const verifyEmail = async() => {
   try {
     const response = await fetch(API_URL + `?access_key=${ACCESS_KEY}&email_address=${EMAIL}`);
     const data = await response.json();
     console.log(data);


   } catch(error) {
     console.error(error.message);
   }
 }


 useEffect(() => {
   verifyEmail();
 },[])
For now, log the data to the console so we can take a look at it, once we’re sure it returns as expected, we’ll add this data to our state.
Examine the Data
The endpoint returns the following JSON:

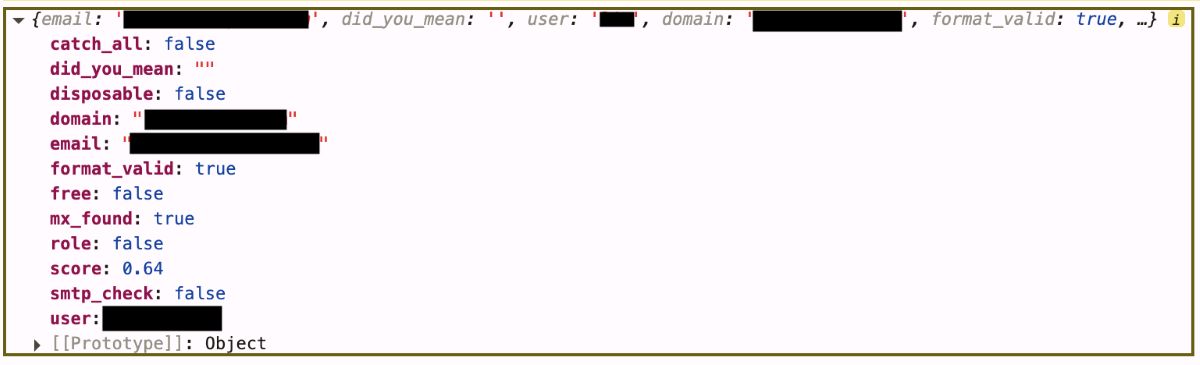
We’re provided with information about the email’s format, MX and SMTP records, a quality score, and whether it is a catch-all, role-based, free, or disposable address.
The did_you_mean field is a handy feature that makes suggestions for possible fixes if the API suspects there may be a typo in the address.
Use the Data
Since we’re building a secure user registration system, we want to allow our user to sign up for our theoretical app only if certain criteria are met. In this case, we want to allow our user to progress only if the email is not a catch-all, role-based, or disposable email, and if the format is valid, the MX and SMTP checks both pass, and the quality score is greater than .60.
Create a Service
We’ll write a function to check all these values in a services file. Create the file by running this command inside the project’s src folder:
$ touch services.js
Inside services.js, create the following helper function.
					export const validateEmailData = ({
   catch_all,
   disposable,
   format_valid,
   mx_found,
   role,
   score,
   smtp_check
}) => {
   const isValidProvider =  !catch_all && !disposable && !role;
   const checksPass = mx_found && smtp_check;
   const highQuality = score > .6;
   return isValidProvider && checksPass && highQuality && format_valid;
This checks each relevant value and returns true only if thresholds for each value are met. See Object Destructuring for an explanation of destructuring syntax.
Use the Validation Result
Based on this result, we want to either allow our user to sign up for the app or not. In the next step, we’ll build a UI to show the user whether or not they’ve been verified. Before we can build that UI, we need to capture the validation response in the app state.
					import { useEffect, useState } from 'react'; //added useState
import { validateEmailData } from './services';


...

 const [isValidated, setIsValidated] = useState(false);


...

 const verifyEmail = async() => {
   try {
     const response = await fetch(API_URL + `?access_key=${ACCESS_KEY}&email=${EMAIL}`);
     const data = await response.json();
     const isValid = validateEmailData(data.details);
     setIsValidated(isValid);
   } catch(error) {
     console.error(error.message);
   }
 }
Instead of just logging our data to the console, we’re not checking all the validation values and deciding whether or not to validate the user based on those values. We set that validationresult into state so we can use it to display a message to our user.
Step Four: Building the UI
Up to this point, we’ve used a hard coded email address to implement email validation testing. For the actual user registration form, however, we want to capture a real email address from a user. Let’s build the inputs for that first.
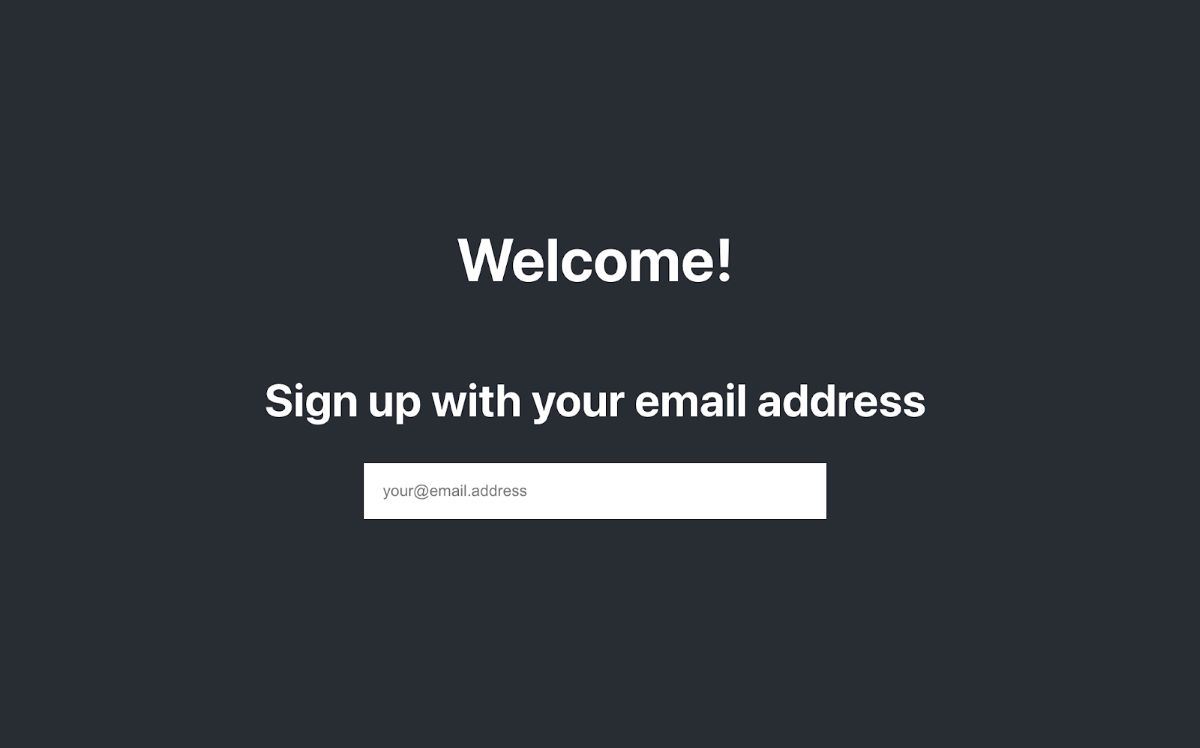
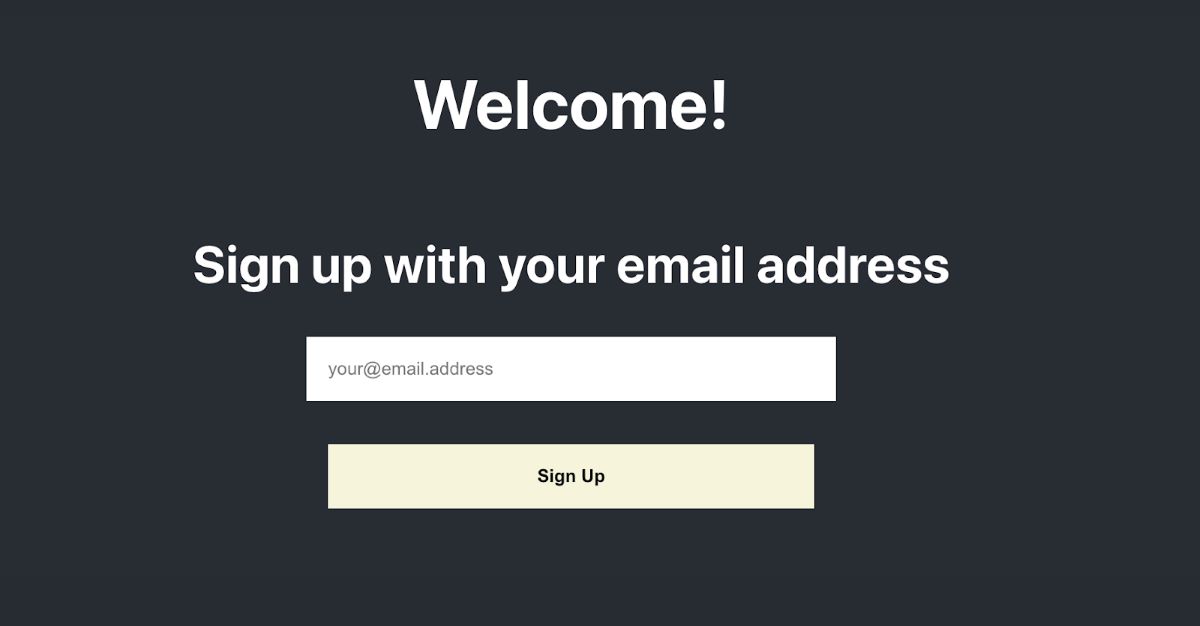
Add the following between the
					 Welcome!
       Sign up with your email address
        setUserEmail(e.target.value)}
         className='email-input'
       />
Let’s also style the textbox a bit with some simple CSS:
					.email-input {
 border: none;
 outline: none;
 padding: 1rem;
 width: 25%;
}
Head back to the browser to see what it looks like. You should have a nicely styled email input box and welcome note for the user:

Step Five: Capturing User Input
As you’ll see on the element, we have a value field and an onChange handler. The value field will hold our user input so we can add it to the app state. The onChange handler is how we’ll update that state. Let’s go ahead and add the userEmail value to state:
const [userEmail, setUserEmail] = useState("");
The setUserEmail function is what we call in the onChange handler to update the state.
Step Six: Validating User Input
Once we have the user’s email in state, we can send it to the API for validation. Let’s add a button that the user can click to “sign up” for our theoretical app. When the user clicks this button, the first thing we’ll do is send their email to the API for validation. Then, once we’ve checked the API response, we’ll either confirm the user’s signup, or show the user an error that their email was invalid.
Remove the hard coded EMAIL value from the API call, and replace it with the value pulled from state:
					const EMAIL = “your@email.com”; // remove this
...
//update this
const response = await fetch(API_URL + `?access_key=${ACCESS_KEY}&email=${userEmail}`);
Next, add a button below the element, and hook up the verifyEmail function to run when the user clicks the button, instead of in the useEffect hook. You can delete the useEffect.
//delete this
useEffect(() => {
verifyEmail();
},[])
//add this
Remember: in the verifyEmail function, we send the email to the API, the API sends a response object with some validation data, and we use that data to decide if the email is valid. Then we set a value state called isValidated based on that decision.
Our button style looks like this:
					.button {
 margin-top: 2rem;
 padding: 1rem;
 width: 25%;
 font-weight:bolder;
 background-color: beige;
 border: none;
 box-shadow: none;
}
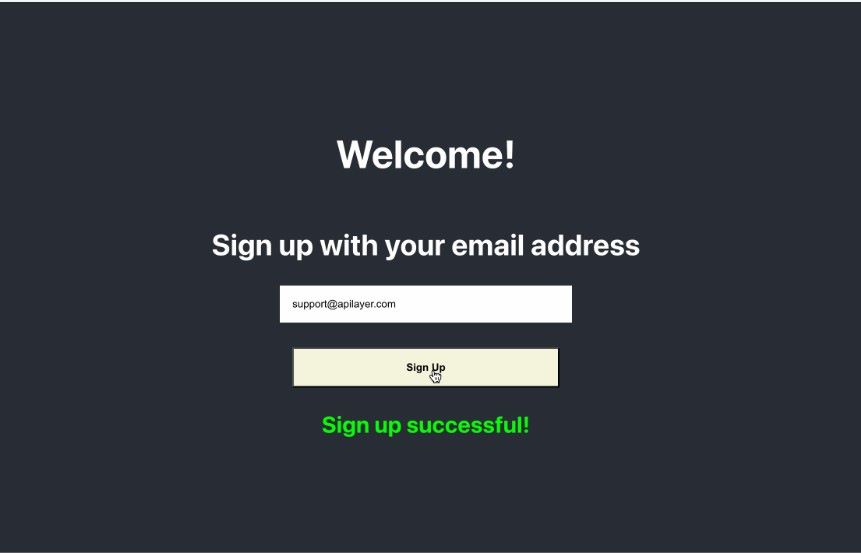
And the result in the UI is this:

Step Seven: Showing the User the Result
We almost have all the pieces of our secure user registration system in place. Now, we just need to show the user a message telling them whether signup was successful, or if the email was invalid. To do that, we’ll render a message underneath the “Sign Up” button, based on the isValidated value that we set in state after the API validates the email.
Add the following to the HTML under the “Sign Up” button:
					 {
   hasValidated &&

        {isValidated ? "Sign up successful!" : "Email invalid. Please try again."}

  }
We’ve added a new value to state here, called hasValidated. We only want to show the user this message after they’ve clicked the “Sign Up” button and we’ve validated their email. Let’s add the new hasValidated value to state, and then update it to true at the same time we set the isValidated result.
					const [hasValidated, setHasValidated] = useState(false);


...
// inside verifyEmail
     const isValid = validateEmailData(data.details);
     setHasValidated(true);
     setIsValidated(isValid);
Putting it All Together
When the app loads, the user is provided with a signup input, they input their email, click “Sign Up”, and we validate their email against the API. If the email passes our validation check, we show them a message that says “Sign up successful!” If not, we tell them the email was invalid, and to please try again.
Here it is in action:

Complete Code for the Email Validator
App.js
import { useState } from 'react';
import './App.css';
import { ACCESS_KEY, API_URL } from './environment';
import { validateEmailData } from './services';
function App() {
const [isValidated, setIsValidated] = useState(false);
const [userEmail, setUserEmail] = useState("");
const [hasValidated, setHasValidated] = useState(false);
const verifyEmail = async() => {
setHasValidated(false);
try {
const response = await fetch(API_URL + `?access_key=${ACCESS_KEY}&email=${userEmail}`);
const data = await response.json();
const isValid = validateEmailData(data);
setHasValidated(true);
setIsValidated(isValid);
} catch(error) {
console.error(error.message);
}
}
return (
Welcome!
Sign up with your email address
setUserEmail(e.target.value)}
className='email-input'
/>
{
hasValidated &&
{isValidated ? "Sign up successful!" : "Email invalid. Please try again."}
}
);
}
export default App;
App.css
					.App {
 text-align: center;
}


.App-header {
 background-color: #282c34;
 min-height: 100vh;
 display: flex;
 flex-direction: column;
 align-items: center;
 justify-content: center;
 font-size: calc(10px + 2vmin);
 color: white;
}


.email-input {
 border: none;
 outline: none;
 padding: 1rem;
 width: 25%;
}


.button {
 margin-top: 2rem;
 padding: 1rem;
 width: 25%;
 font-weight:bolder;
 background-color: beige;
 border: none;
 box-shadow: none;
 cursor: pointer;
}


.valid {
 color: lime;
}


.invalid {
 color: palevioletred;
}
services.js
					export const validateEmailData = ({
   catch_all,
   disposable,
   format_valid,
   mx_found,
   role,
   score,
   smtp_check
}) => {
   const isValidProvider =  !catch_all && !disposable && !role;
   const checksPass = mx_found && smtp_check;
   const highQuality = score > .6;
   return isValidProvider && checksPass && highQuality && format_valid;
}
Next Steps
From here, you’d want to send the validated email to your back end for storage in your user database. You’d also want to redirect the user into the next step of your signup flow. Currently, we’re not rendering any error messages for the user if something goes wrong with the API call or the API returns an error, so we should definitely improve error handling. Finally, you could use a form management system like React Hook Forms or Formik to build more complex client-side validation.
Mailboxlayer: An API for Real-Time Email Validation
This article should have given you a basic idea of how to implement email verification in a web application to prevent fake user accounts from infiltrating your data. Take your project to the next level with one of the suggestions above!
FAQs
What is email validation?
Email validation is the process of determining whether a provided email is properly formatted, real, and active. Preventing fake user registrations is a critical first step in any Secure User Registration System, enhancing user data quality and ensuring registration form security.
Is Regex enough for email validation?
While email validation using regular expressions is possible, it is not recommended to use Regex alone to validate emails. Regex can’t capture all the varied formats for email addresses, and it won’t tell you if an email passes SMTP checks, has active MX records, or if it is a disposable, free, or catch-all email. It is recommended to use an email validation API like Mailboxlayer.To build a reliable Secure User Registration System, it is recommended to use an email validation API like Mailboxlayer.
What is the Mailboxlayer API used for?
The Mailboxlayer API is an API for implementing email verification in web applications. It receives a REST request with an email for validation, and returns a simple JSON response with validation information about that email, including MX and SMTP checks, a quality score, and information about whether the email is free, role-based, or disposable.
How much does Mailboxlayer cost?
Mailboxlayer offers a free plan with up to 100 API requests per month. Paid plans offer higher limits and more advanced features like SMTP checks and typo suggestions, and they start at $7.99 per month. Take a look at the pricing page for more details. These plans are ideal for building a robust Secure User Registration System.
Can I build an email validator using React?
It’s very easy to do email validation in online forms using React. React makes it simple to build user inputs that capture an email address, and you can use an email validation API integration to handle the verification part. Tools like React Hook Form and Formik make complex web forms easy to manage while maintaining a Secure User Registration System.
What happens if an email fails validation?
If an email doesn’t meet the validation criteria (like being disposable or failing SMTP checks), your app can reject the signup and display an error message to the user.
What additional features does Mailboxlayer offer?
Mailboxlayer includes typo detection (Did-You-Mean suggestions), quality scoring, and checks for role-based emails (like info@, support@) to help filter low-value signups — essential features for a reliable Secure User Registration System.
Start Securing Your Platform Today
Get started with IPstack’s Security Module today → sign up now and protect your system from fraud
Sign up for Aviationstack & Mailboxlayer and start sending real-time flight alerts