


Notifications about fluctuations in the stock market are crucial for users who closely track stock prices for their portfolios. In this article we’ll show you how to build a web app that uses real-time daily stock market data from the Marketstack API to send an end-of-day email wrap-up to users about stock prices they’ve chosen to hear about.
Table of Contents
You Will Learn
- How to get real-time stock data using the Marketstack API
- How to send automated emails using Mailgun and Node.js
- How to build a simple React app with custom stock alerts
- How to schedule tasks with Node Cron
Prerequisites
This open source tutorial assumes familiarity with React and APIs. To brush up on React, check the docs. If you’re unfamiliar with what an API is, have a look at APILayer’s overview.
You should also have Node, which can be installed using the Homebrew package manager. You can check your version of Node using the following command:
$ node -v
Overview
Here’s a broad outline of what this app will do:
- Let the user choose what stocks they want information about from a list of symbols
- Let the user input the email address they want the information sent to
- Schedule a function to run once a day and hit the Marketstack API, pull information about stocks the user chose, and send it to the user in an email using Mailgun
Step One: Getting Started With Marketstack
We’ll be using the Marketstack API to pull free stock data and Mailgun’s API to send emails to users. Both APIs accept requests made using a straightforward HTTP GET URL, and responses are returned as JSON.
Sign Up for Marketstack
The Marketstack API has a free tier that allows up to 100 free requests per month. You can sign up for a free account.
Get Your Free
Stock Data API Key!
Marketstack
Join thousands of developers using Marketstack for real-time market data!
Get Your Free API Key!No Credit Card Required*
100 Requests Free!
Once you’ve signed up, go to your dashboard, where you’ll find your API access key, statistics on monthly usage, and links to a quickstart guide and documentation. Make a note of your access key and look at the documentation for an overview of the endpoints.
Marketstack Endpoints
We’ll be using two Marketstack API endpoints: the Tickers List endpoint to return a complete list of all available stock tickers, and the End of Day endpoint, to return EOD info about selected stocks.
Tickers List
The tickers list endpoint returns a complete list of all 50,000+ stock tickers for which the Markestack API has free stock API data. We’ll use this to populate the list that the user will choose from to tell us which tickers they want information about in their daily email.
The base URL is this:
https://api.marketstack.com/v2/tickerslist
View the complete list of all available tickers here.
End of Day
The endpoint we’ll be using to pull end-of-day stock data is called, conveniently, End of Day Data. This endpoint returns end-of-day stock market data for over 50,000 different stock tickers.
The V2 EOD endpoint (which is the one we’re using) also supports information for 2700+ stock exchanges like NASDAQ, PINK, SHG, NYSE, NYSE ARCA, OTCQB, and BATS.
The base URL for the endpoint is:
https://api.marketstack.com/v2/eod/latest
The “latest” path ensures that we’ll only return data from today.
Querystring Parameters
To these base URLs, we’ll be appending some parameters. The two required parameters are the access_key parameter, which authenticates you to the API, and symbols (for the end of day endpoint only) – a list of stock tickers that the user wants to receive information for.
An example of a complete querystring for a request to the end of day endpoint might look like this:
GET https://api.marketstack.com/v2/eod/latest?access_key=YOUR-ACCESS-KEY&symbols=AAPL,MSFT
Which returns the following JSON:
					{
    "pagination": {
      "limit": 100,
      "offset": 0,
      "count": 100,
      "total": 9944
    },
    "data": [
      {
        "open": 228.46,
        "high": 229.52,
        "low": 227.3,
        "close": 227.79,
        "volume": 34025967.0,
        "adj_high": 229.52,
        "adj_low": 227.3,
        "adj_close": 227.79,
        "adj_open": 228.46,
        "adj_volume": 34025967.0,
        "split_factor": 1.0,
        "dividend": 0.0,
        "name": "Apple Inc",
        "exchange_code": "NASDAQ",
        "asset_type": "Stock",
        "price_currency": "usd",
        "symbol": "AAPL",
        "exchange": "XNAS",
        "date": "2024-09-27T00:00:00+0000"
        },
      [...]
    ]
}
Step Two: Getting Started with Mailgun
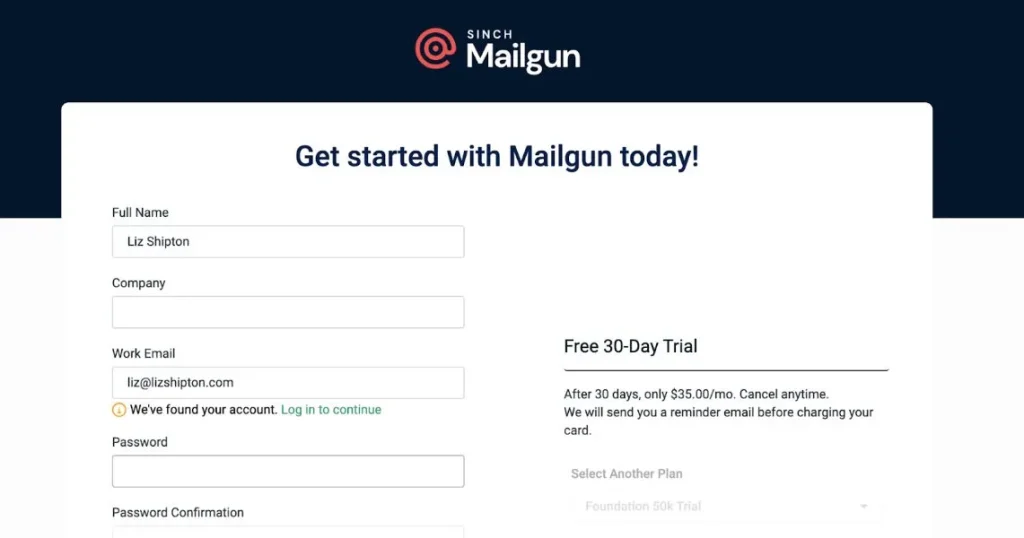
Mailgun will handle sending an email to our user. It provides a free 30-day trial allowing you to send up to 100 emails per day. You need to provide credit card information at signup, but you can cancel any time and they will send you a notification email before they charge your card. Sign up for the free trial at https://signup.mailgun.com/new/signup.

Once you’ve signed up, head to your dashboard for an overview of the service. You’ll need to create an API key, which you can do by clicking the “Get Started” link on the left:


Next, you need a sending domain (usually this is the domain associated with your company) that will be the address your emails come from. Mailgun provides sandbox domains for you to use while testing. Click “Send” and then “Domains” in the left column to set this up.
These sandbox domains can only be used to send emails to a list of authorized recipients, so add your own email address to the authorized recipient list and verify it for testing purposes. Select “API Send” when adding your address.


Finally, you’ll need to import the Mailgun Javascript SDK into your backend dependencies. We’ll do this in the next step.
Note: In a production app, you’d want to validate the user’s email before sending. We’re going to skip that in this tutorial, but check out this Aviationstack tutorial to see how to validate a user’s email using the Mailboxlayer API.
Step Three: Getting Started With the Web App
We’ll use Node to build our backend and Create React App to develop the client side. CRA is a framework that helps you quickly build and test React projects. The React docs have an excellent Get Started guide.
Create Folder & Install Frontend Dependencies
Create a top-level directory for your project. Then cd into the folder and use npx to install Create React App and spin up the client side application in one command:
					$ mkdir stock-email-app
$ cd stock-email-app
$ npx create-react-app client
You’ll be walked through a quick setup wizard. Once you’ve finished, you can start the app by running:
					$ cd client
$ npm start
Head to localhost:3000 in your browser. You should see the following boilerplate, provided by Create React App:

Delete everything between the two
Install Backend Dependencies
Navigate back to the root directory and create a folder next to the client folder for your server. Then navigate into it and install the backend dependencies.
We’ll use Node and Express to get a server up and running quickly, we’ll import the Mailgun SDK and FormData to help us send emails, and we’ll use Dotenv to handle our environment variables. Finally, we’ll use Node Cron to schedule a job that pulls stock data and sends an email every day at 5PM.
					$ cd ../
$ mkdir server
$ cd server && npm init
$ npm install -s express dotenv mailgun.js form-data node-cron
Step Four: Setting up the Server
Instead of sending requests directly from our frontend to the Marketstack and Mailgun APIs, we’re going to proxy them through our own server. This allows us to keep API keys secret, and handle all the logic of polling the Marketstack API and sending the emails.
Spin Up Express
Navigate into your server folder and create a file called index.js. This is where we’ll write the code for our server and set up the route that will handle requests from our frontend. Inside index.js add the following:
					const express = require("express");
const PORT = 8000;
const app = express();
app.set('trust proxy', true);


app.listen(PORT, () => {
console.log(`Server listening on ${PORT}`);
});
Note: the ‘trust proxy’ value here allows us to send requests from our frontend to our backend without running into CORS issues.
Then, in your terminal, run
$ node index.js
to start the server. You’ll see “Server listening on 8000” print out in your terminal console.
Handle Secrets
Create a file called .env inside your server directory, and put all your API keys and the base URLs for your APIs in it. Next, configure dotenv in index.js. You can now pull the values off process.env:
					require('dotenv').config();
const MARKETSTACK_KEY = process.env.MARKETSTACK_KEY;
const MARKETSTACK_URL = process.env.MARKETSTACK_URL;
Inside your .env file:
					MARKETSTACK_KEY="YOUR KEY"
MARKETSTACK_URL="https://api.marketstack.com/v2"
MAILGUN_KEY="YOUR KEY"
MAILGUN_DOMAIN="YOUR SANDBOX DOMAIN"
Note that we’re using the base URL for Marketstack here, because we’ll append the relevant endpoints as we need them.
Create the Routes
We’re going to need two routes: one to pull the initial ticker information from Marketstack to populate our dropdown, and one to pull the relevant stock data at the end of each day and send an email to the user.
Let’s build the ticker information route first. Add the following code to index.js:
					app.get('/tickers', async (req, res) => {
   const URL = `${MARKETSTACK_URL}/tickerslist?access_key=${MARKETSTACK_KEY}`;
   const response = await fetch(URL);
   const json = await response.json();
   const data = formatForClient(json.data);
   res.send(JSON.stringify(data))
})
When our frontend app mounts, it will hit this endpoint to get the list of tickers to show to the user. We’re using a helper function called formatForClient to map the data down to just the name and ticker symbol and assign them to values the picker element in our client will be expecting. You can write that helper function in a file called helpers.js – here’s what it looks like:
					export function formatForClient (data) {
   return data.map(({name, ticker}) => {
       return {
           label: name,
           value: ticker
       }
   });
}
Now let’s build the second route:
					app.get('/signup', async (req, res) => {
   // pull user email and chosen stock tickers from req object
   // fetch data about tickers from Marketstack API
   // send an email with that data using Mailgun
})
We’re not writing this logic yet. First, let’s get the relevant info from the user.
Step Four: Building the UI
We’ll keep the UI for this app simple, because the main purpose of it is sending the emails. We need an input for the user to give us their email address and a list of stock ticker symbols to choose from. We also need a button that sends all the information we need to our server.
Before You Start
Add the following line to your client’s package.json file:
"proxy": "http://localhost:8000",
This tells the client to proxy outgoing requests to our server.
Build the Email Input
Create a text input that accepts a user’s email address and populates the app state with the given value. Here’s the code, which goes in your App.js file:
					import './App.css';


function App() {


 const [userEmail, setUserEmail] = React.useState("");


 return (


     Welcome!
       Sign up for email notifications about stocks

        setUserEmail(e.target.value)}
         className='input'
       />


 );
}


export default App;
Build the Ticker List
We’ll use a library called React Select to build a dropdown that lets the chooser select their stock tickers. Install it with NPM:
$ npm install -s react-select
You can read a complete description of how to use this library here. We won’t need more than the basic usage. Here’s the code, which we’ve added to App.js:
import './App.css';
import React from 'react';
import Select from 'react-select';
function App() {
const [userEmail, setUserEmail] = React.useState("");
const [chosenStocks, setChosenStocks] = React.useState([]);
const [options, setOptions] = React.useState([]);
const pullTickers = async () => {
const response = await fetch('/tickers');
const data = await response.json()
setOptions(data);
}
React.useEffect(() => {
pullTickers();
},[])
return (
Welcome!
Sign up for email notifications about stocks
setUserEmail(e.target.value)}
className='input'
/>
{
options &&
);
}
export default App;
Our pullTickers function hits our server’s tickers route, which hits the Marketstack API tickerslist endpoint and returns the tickers, formatted for our client. We call this function inside a useEffect hook so that it runs when the app mounts.
Once the symbols are in app state, we use them to populate the Select component, using the name as the display label (to make it easy for the user to see what’s what) and the symbol as the value that gets recorded when the user makes a choice.
The onChange function pushes the chosen symbol into an array in state, or removes it from that state (this is handled for us by the React Select library.)
Build the Button
Once all the choices have been made and the user has given us their email, we can send everything to our API. Put a button component at the bottom of the UI, and in the onClick handler, put the following function:
					const signUp = async () => {
   const tickers = [];
   for (let stock of chosenStocks) {
     tickers.push(stock.value)
   }
   const signUpQuery = `/signup?email=${userEmail}&tickers=${tickers}`
   const response = await fetch(signUpQuery);
   if (response.ok) {
     alert("You've signed up for daily updates about these stocks!")
   }
 }
This gathers all the state we’ve collected from our user inputs, formats it into a querystring, and sends it to our API. Note that the URL we’re hitting is the signup endpoint we built on our server. We’re also formatting the tickers data to send just the symbols and not the names, as that’s all the Marketstack API will need when we forward the request.
We’re also letting the user know that they successfully signed up, once the response comes back as “OK” from our server.
Style with CSS
The CSS for this is pretty simple – just some flexboxing to space everything nicely, some padding for the email input, and a bit of color for the multiselect dropdown. Here’s the code:
					.signup {
display: flex;
flex-direction: column;
align-items: center;
margin-bottom: 2rem;
width: 50%;
}


.input {
 border: none;
 outline: none;
 padding: 1rem;
 width: 35%;
 border-radius: 4px;
}


.stock-picker {
 color: black;
 margin-top: 2rem;
}
Head to the app in your browser, and it should look like this:


Step Six: Retrieving Stock Market Data
Once the user hits “Sign Up”, we send their info to our server, which fetches the data from Marketstack and sends the user an email. For now, we’ll do this as soon as we get the request from our frontend. In a later step, we’ll instead have this route schedule a task that does this at the end of every day.
Replace the comments in the signup route with the following code:
					app.get('/signup', async (req, res) => {
   const {tickers, email} = req.query;
   const URL = `${MARKETSTACK_URL}/eod/latest?access_key=${MARKETSTACK_KEY}&symbols=${tickers}`
   const response = await fetch(URL);
   const json = await response.json();
   console.log(json.data);
})
This pulls information about the user’s chosen tickers from Marketstack and logs it to the console. In the next step, we’ll use this data to populate an email notification and send it via Mailgun.
Step Seven: Sending the Email Notification
Once we have the free stock data from Marketstack, we need to send it in an email using Mailgun. Remember, the email address you’re using as the “from” email is the sandbox address that Mailgun provided. We can have Mailgun send this email for us by sending a simple API request like any other API.
Let’s pull this logic out into a separate function, and then call that function inside our signup route, to keep the logic inside signup a bit cleaner. Here’s the function, called sendEmail, which we can add to the helpers.js file:
					export async function sendEmail (userEmail, stockData) {
   const mailgun = new Mailgun(FormData);
   const mg = mailgun.client({
       username: "api",
       key: process.env.MAILGUN_KEY,
   });
   try {
   const data = await mg.messages.create(process.env.MAILGUN_DOMAIN, {
     from: `postmaster@${process.env.MAILGUN_DOMAIN}`,
     to: [userEmail],
     subject: "Your Daily Stock Roundup",
     text: stockData,
   });
 } catch (error) {
   console.log(error);
 }
}
And inside our signup route, replace the console.log below the call to fetch the data from Marketstack:
					     try {
       sendEmail(email, json)
       res.send("User signed up for daily emails")
   } catch(err) {
       res.status(500).send(err)
   }
If we go into the client now and enter our email and choose some stocks, and hit “Sign Up” we should see the alert that we were successfully signed up, and Mailgun should handle sending the email. Check your inbox to verify you received it (the message may go to spam, so check all your folders.)

Note: We’re only sending the raw JSON data in the email body. Pull the relevant values out of the JSON object and interpolate them into a string to send a nicely formatted email to the user.
You can also check the Mailgun dashboard to see evidence that the email has been sent:


Step Eight: Sending Once a Day
Right now, we’re only sending an email when the user clicks the “Signup” button. But what we actually want to do is hit the Marketstack API and send an email once a day.
This is easy to do with Node Cron. All we have to do is require the dependency at the top of index.js and schedule a job that runs once a day at a specified time (let’s go with 5PM.)
First, modify the sendEmail function so that the call to the Marketstack API happens inside that function:
					export async function sendEmail (email, tickers) {
  const URL = `${process.env.MARKETSTACK_URL}/eod/latest?access_key=${process.env.MARKETSTACK_KEY}&symbols=${tickers}`;
  const response = await fetch(URL);
  const json = await response.json();
  const mailgun = new Mailgun(FormData);
  const mg = mailgun.client({
      username: "api",
      key: process.env.MAILGUN_KEY,
  });


  try {
   const data = await mg.messages.create(process.env.MAILGUN_DOMAIN, {
       from: `postmaster@${process.env.MAILGUN_DOMAIN}`,
       to: [userEmail],
       subject: "Your Daily Stock Roundup",
       text: json, // raw JSON
   });
   console.log(data);
} catch (error) {
  console.log(error);
}
}
Next, instead of just calling sendEmail inside the signup route, schedule a cron job to call it instead. Here’s the code:
					const cron = require('node-cron');
...


// inside signup route
...
   try {
       cron.schedule('0 17 * * *', () => sendEmail(email, tickers), {
           timezone: 'America/Los Angeles' // your timezone
       });
       res.send("User signed up for daily emails")
   } catch(err) {
       res.status(500).send(err)
   }
Putting it All Together
Let’s recap what we did in this tutorial:
- Created a UI where they can input their email address and choose from a list of stocks to receive updates about
- Pulled data for the chosen stocks
- Put the data into the body of an email and used Mailgun to send the email to the user
- Used Node Cron to schedule steps 2 & 3 to run once per day at 5PM
Complete Code
Here’s the complete front and backend code.
App.js
import './App.css';
import React from 'react';
import Select from 'react-select';
function App() {
const [userEmail, setUserEmail] = React.useState("");
const [chosenStocks, setChosenStocks] = React.useState([]);
const [options, setOptions] = React.useState([]);
const pullTickers = async () => {
const response = await fetch('/tickers');
const data = await response.json()
setOptions(data);
}
const signUp = async () => {
const tickers = [];
for (let stock of chosenStocks) {
tickers.push(stock.value)
}
const signUpQuery = `/signup?email=${userEmail}&tickers=${tickers}`
const response = await fetch(signUpQuery);
if (response.ok) {
alert("You've signed up for daily updates about these stocks!")
}
}
React.useEffect(() => {
pullTickers();
},[])
return (
Welcome!
Sign up for email notifications about stocks
setUserEmail(e.target.value)}
className='input'
/>
{
options &&
);
}
export default App;
App.css
					.App {
 text-align: center;
}


.App-header {
 background-color: #282c34;
 min-height: 100vh;
 display: flex;
 flex-direction: column;
 align-items: center;
 justify-content: center;
 font-size: calc(10px + 2vmin);
 color: white;
}


.signup {
display: flex;
flex-direction: column;
align-items: center;
margin-bottom: 2rem;
width: 50%;
}


.input {
 border: none;
 outline: none;
 padding: 1rem;
 width: 35%;
 border-radius: 4px;
}


.stock-picker {
 color: black;
 margin-top: 2rem;
 width: 100%;
}


.button {
 margin-top: 2rem;
 padding: 1rem;
 width: 25%;
 font-weight:bolder;
 background-color: purple;
 color: white;
 border: none;
 box-shadow: none;
 cursor: pointer;
}
index.js
					const express = require("express");
const cron = require('node-cron');
const { sendEmail, formatForClient } = require("./helpers");
const PORT = 8000;
const app = express();
app.set('trust proxy', true);


require('dotenv').config();
const MARKETSTACK_KEY = process.env.MARKETSTACK_KEY;
const MARKETSTACK_URL = process.env.MARKETSTACK_URL;


app.get('/tickers', async (req, res) => {
   const URL = `${MARKETSTACK_URL}/tickerslist?access_key=${MARKETSTACK_KEY}`;
   const response = await fetch(URL);
   const json = await response.json();
   const data = formatForClient(json);
   res.send(JSON.stringify(data))
})


app.get('/signup', async (req, res) => {
   const {tickers, email} = req.query;
   const URL = `${MARKETSTACK_URL}/eod/latest?access_key=${MARKETSTACK_KEY}&symbols=${tickers}`
   const response = await fetch(URL);
   const json = await response.json();
   try {
       cron.schedule('0 17 * * *', () => sendEmail(email, json), {
           timezone: 'America/Los Angeles' // your timezone
       });
       res.send("User signed up for daily emails")
   } catch(err) {
       res.status(500).send(err)
   }
})


app.listen(PORT, () => {
console.log(`Server listening on ${PORT}`);
});
helpers.js
					import Mailgun from 'mailgun.js';
import FormData from 'form-data';


export function formatForClient (json) {
   const data = json.data;
   return data.map(({name, ticker}) => {
       return {
           label: name,
           value: ticker
       }
   });
}


export async function sendEmail (userEmail, stockData) {
   const mailgun = new Mailgun(FormData);
   const mg = mailgun.client({
       username: "api",
       key: process.env.MAILGUN_KEY,
   });
   try {
   const data = await mg.messages.create(process.env.MAILGUN_DOMAIN, {
     from: `postmaster@${process.env.MAILGUN_DOMAIN}`,
     to: [userEmail],
     subject: "Your Daily Stock Roundup",
     text: stockData,
   });


   console.log(data);
 } catch (error) {
   console.log(error);
 }
}
Next Steps
The first thing you’d need to do before deploying this to production is register a real domain with Mailgun (for example, your company domain) and stop using the sandbox domain. Then, you’d want to format a proper email to display the stock data, rather than just sending the raw JSON. Next, we could greatly improve the user experience in the UI by making the dropdown searchable. We also did basically no error-handling in this demo, so that would need to be addressed.
One more thing to note: currently, the call to the Marketstack tickers endpoint only returns the first 100 stock symbols. This is because, with information for over 55,000 stocks, the API paginates results and sends 100 at a time. In order to get back the complete list of all stocks, you would need to make multiple calls to the API and combine the paginated results into a response for the client.
Marketstack and Mailgun
This article should give you a jumping-off point to explore all the capabilities of the Marketstack stock API and Mailgun email service. Take your project to the next level by implementing one of the next steps outlined above, or explore one of APILayer’s other APIs to add additional functionality.
FAQs
What is Marketstack stock screener?
A stock screener or stock screening app lets a user view information about specified stock ticker symbols. Usually it is accompanied by a visualization chart that shows the stock’s fluctuations over time, and may include the option for a user to sign up for automated alerts about the stocks.
How can I get free stock market data?
There are many APIs that provide free real-time stock market data to use in your apps. One such API is the Marketstack free stock API, which has endpoints returning information about end-of-day, intraday, historical, and other data for over 55,000 stock symbols and 2700 exchanges.
Can I send automated email updates using Node?
Yes. It’s easy to send emails in Node using services like Sendgrid, Mailgun, or Nodemailer. You will need a verified sending domain (such as your company domain.) To automate the updates, consider using NodeCron to schedule repeated tasks, or implement a webhook with the API you are querying, if that is available.
How can I send stock price alerts via email automatically?
You can use APIs like Marketstack for stock data and Mailgun to send scheduled emails using Node.js and Cron.
What is the best API for end-of-day stock prices?
Marketstack offers EOD data for 50,000+ tickers and 2700+ exchanges ideal for building custom financial tools.
Can I use Mailgun to send daily updates from an API?
Yes, Mailgun’s API integrates easily with backend scripts and can send scheduled messages using services like Node Cron.