
A real-time flight tracking app with search functionality sounds like a complicated thing to build – but with React and Aviationstack API, it’s not difficult. Learning how to build flight dashboard apps is incredibly useful for engineers developing for travel and business. A React flight tracker can be combined with calendars, email and push notifications to create rich, full-featured applications.
In this tutorial, we’ll walk step-by-step through the process of building a simple web app that allows a user to search for and view real-time updates for their flight. We’ll be using React to create a UI that accepts a user’s flight number and airline, and displays the departure and arrival times, gates, and flight status.
Table of Contents
Key Takeaways:
- Building a flight tracking app with Aviationstack API and React requires minimal setup and coding experience
- The free tier provides 100 API requests per month, ideal for learning and small-scale projects
- Real-time aviation data includes flight status, departure/arrival times, gates, and delay information
- This tutorial demonstrates practical flight status API implementation with user search functionality
- Aviation data integration can be enhanced with date filtering, error handling, and notifications
This AviationsStack tutorial assumes some familiarity with React and with APIs. To brush up on React prior to beginning, check out the docs. If you’re unfamiliar with what an API is, have a look at APILayer’s overview. You should also have yarn installed.
Yarn and Node can be installed via the Homebrew package manager. You can check your version of Node using the following command:
$ node -v
Real-time flight tracking app
Building a real-time flight tracking app with React and the Aviationstack API is an excellent way to enhance your development skills. This comprehensive guide walks you through the process, from setting up your development environment to implementing features like flight search, status updates, and gate information. By following the step-by-step instructions, you’ll learn how to fetch live flight data and display it in an intuitive user interface. Whether you’re a beginner or looking to expand your API integration knowledge, this tutorial provides the tools and insights needed to create a fully functional flight tracker.
Getting Started With AviationStack
AviationStack is a flight data API that provides global aviation data for past, present, and future flights, as well as up-to-the-minute information on routes, airports, airlines, and other flight-related matters.
Signing Up
You can get started with a free plan that allows up to 100 requests per month. Go to https://aviationstack.com/signup/free and input your information to get an access key so you can start making requests against the API.
Get Your Free Flight Data API Keys!
Join thousands of developers using aviationstack for real-time flight data!
Get Your Free API Keys!100 Requests Free!
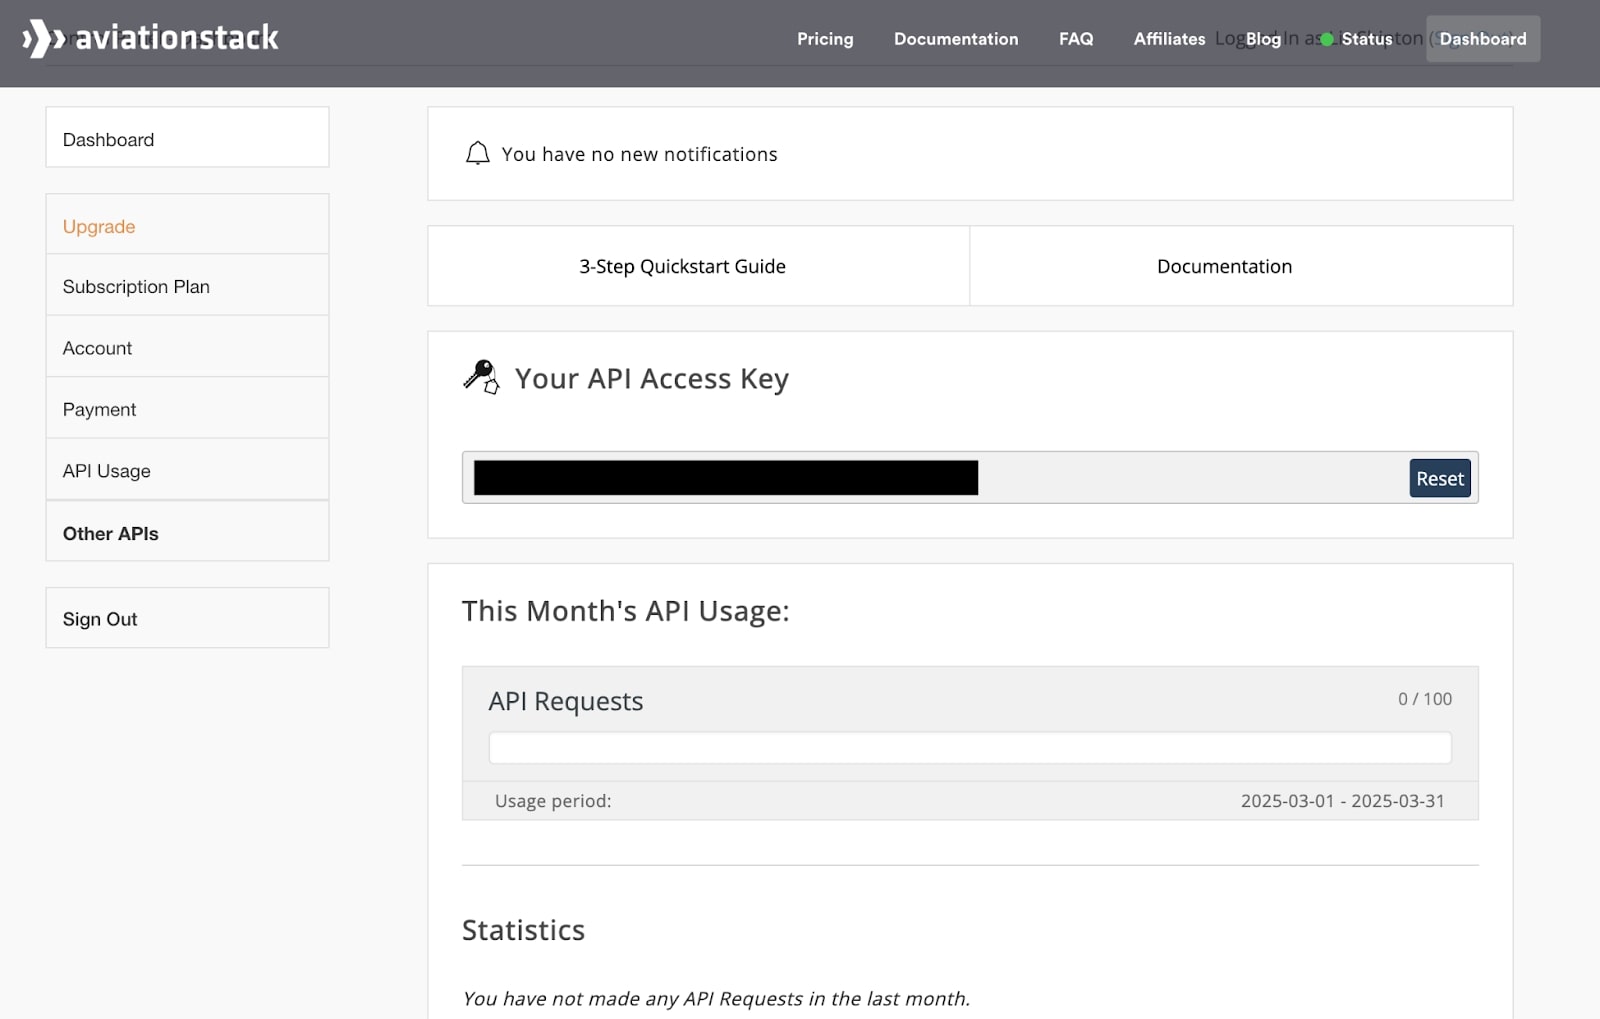
Once you’ve signed up, you’ll be taken to your dashboard, where you’ll see links to Documentation and a Quick Start Guide, along with your access key, usage statistics, and information about your plan. Note your access key (we’ll need it later) and head to the documentation to learn more about the endpoints.
Endpoint
For this tutorial, we’ll be using the Real-Time Flight Data endpoint (called Flights.) This endpoint returns all flights, with the latest-available information on status, departure and arrival times, gate and baggage information, and any known delays.
The endpoint’s base URL is:
https://api.aviationstack.com/v1/flights
Query the endpoint by appending your access key as the first query parameter. By default, the API returns a paginated response containing information for all flights currently active all over the globe, in alphabetical order.
Filtering
You can filter these results by providing additional query parameters.
For example, to receive a list of all currently scheduled flights, append the flight_status parameter with the value scheduled. To receive a list of all flights for a particular airline, append the airline_name parameter. For a list of all flights leaving on a particular date, include the flight_date parameter.
For our purposes, we’ll assume the user has their flight number, and wants to look up information for a real flight, so we’ll use the flight_number parameter to search by flight number.
Visit the Documentation for a complete list of parameters. For now, note your access key, the base URL, and the parameter name we’ll be filtering by. We’ll use these in a later step.
Getting Started With React
Create React App is a framework for getting up and running quickly with React. It allows you to spin up a local dev environment in minutes, without having to configure your own server or dependencies like Babel and webpack.
Installing Dependencies
You’ll need Node>=14 and Yarn installed on your local machine. You can check your Node version by running:
$ node -v
If you need to update, use Homebrew to do so:
					$ brew update
$ brew upgrade node
You can also use Homebrew to install Yarn, if you need to. Then use yarn to install Create React App and create your app.
$ yarn create react-app aviation-app
You’ll be walked through a setup wizard. Once you’ve finished, you can start the app by running:
					$ cd aviation-app
$ yarn start
This will spin up the app at localhost: 3000. Head to the page in your browser to view the boilerplate.
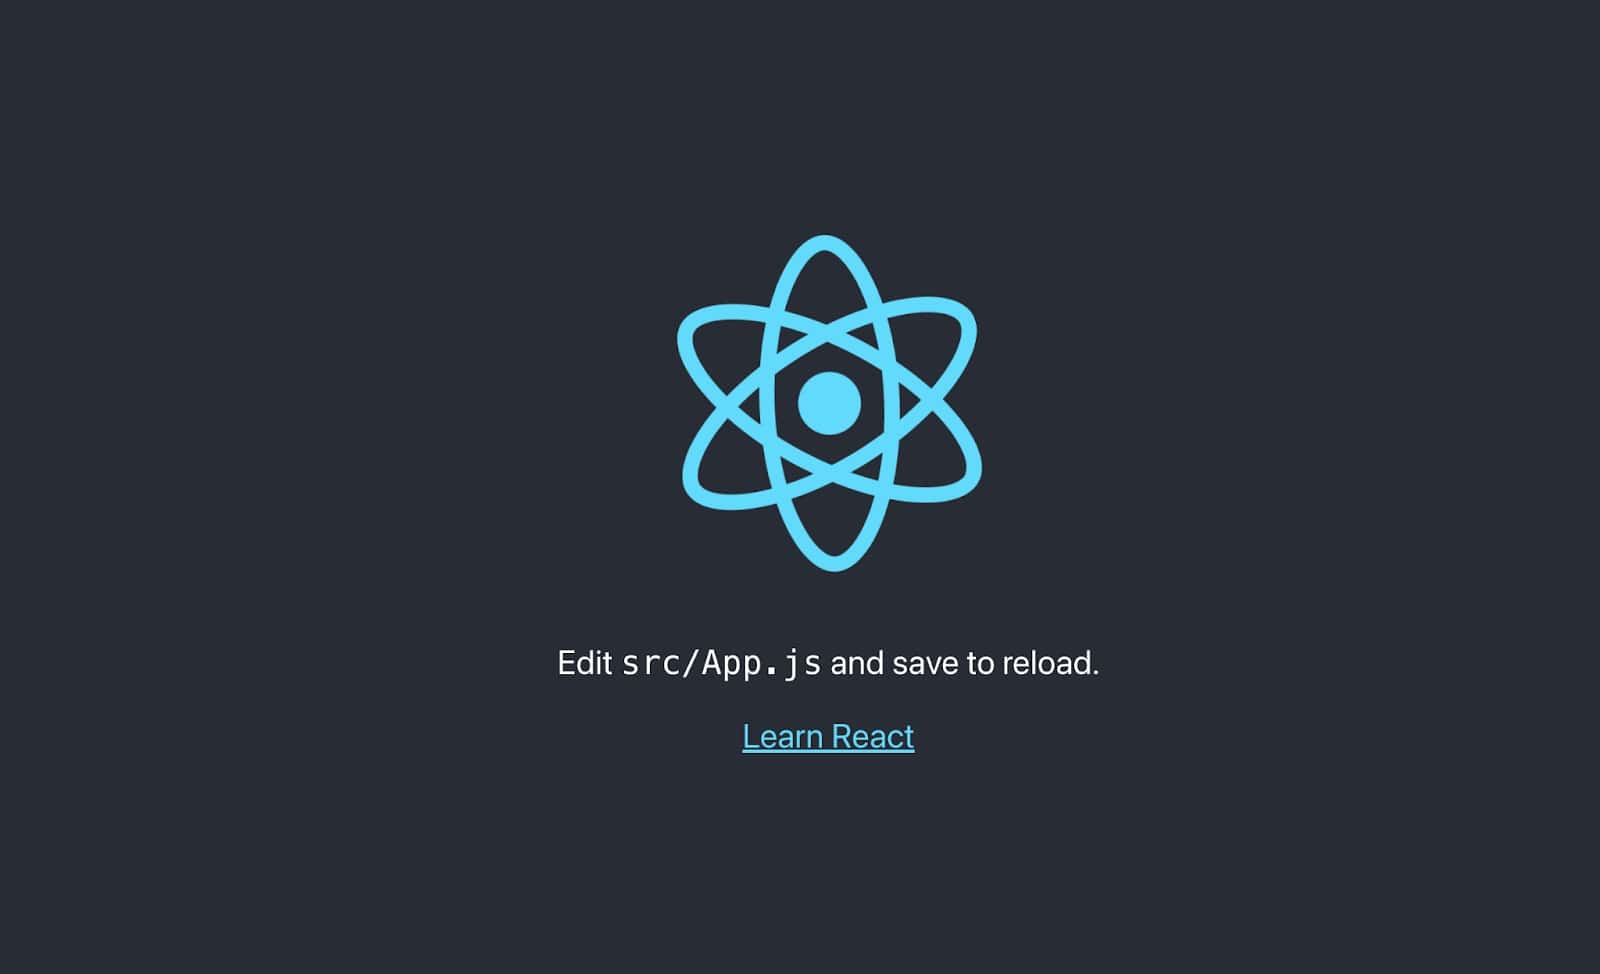
Prepare src/App.js and Test Hot Reloading
We’ll do most of our work directly in the main component, App.js. Open the file in your editor and remove everything between the two header tags. Save the file and go back to the browser to verify that the updates are propagating.
Pulling the Data
We’ll use the React fetch global to send a request to the AviationStack API for our flight data. Since we’re assuming the user will be inputting their flight number, we’ll need to look up our own flight number to use as a test parameter while we’re building.
Getting a Flight Number
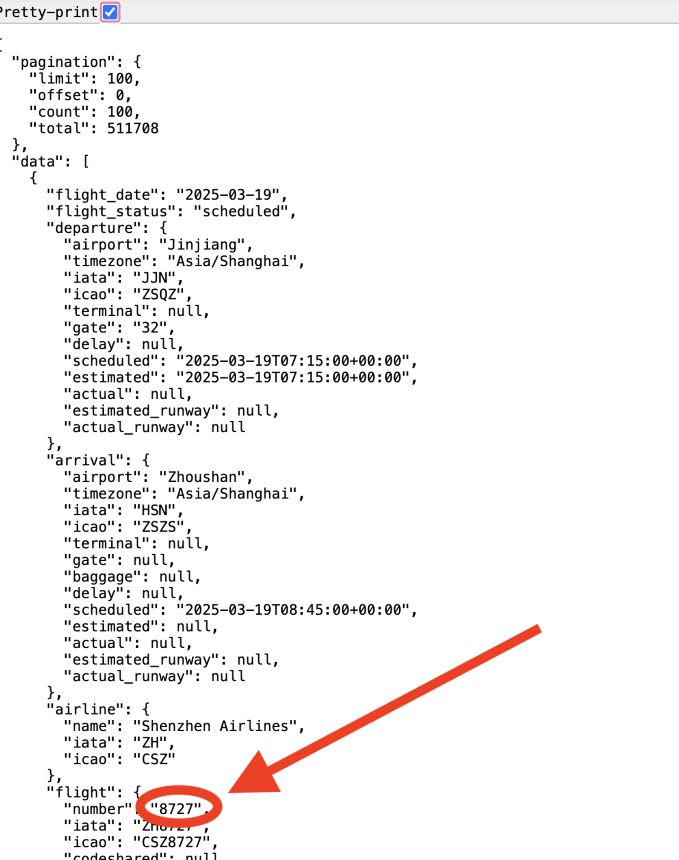
You can grab an active flight number by using the “Run API Request” button provided by the endpoint in the AviationStack documentation:

This button will query the API and load the JSON result into a separate browser tab. Make sure you toggle on “Pretty Print” to view the results. We’ll grab the number from the first flight loaded:
Querying the Endpoint
Write a function in src/App.jsx called pullFlightData. Inside this function, append your access key and the flight number to the AviationStack API base URL, and use fetch to send an HTTP request. Please note that although we are importing our access key directly into App.jsx for the purposes of this tutorial, in a production app you should always put sensitive data like this in an environment file.
Your code should resemble the following:
					import { useEffect } from 'react';


const ACCESS_KEY = "YOUR ACCESS KEY";
const BASE_URL = "https://api.aviationstack.com/v1/flights";
const FLIGHT = "8727";

...
// inside component
useEffect(() => {
   pullFlightData();
 },[])


 const pullFlightData = async () => {
   try {
     const response = await fetch(BASE_URL + `?access_key=${ACCESS_KEY}&flight_number=${FLIGHT}`);
     if (!response.ok) {
       throw new Error(`Response status: ${response.status}`);
     }
      const json = await response.json();
      console.log(json);
   } catch (error) {
     console.error(error.message);
   }
 }
We created the pullFlightData function and sent the request to the API, wrapped in a try/catch block to handle errors. We then call that function inside a useEffect with an empty dependency array so it runs on component mount, and for now, we’re logging the output in the console.
Fine-Tuning the Result
As you can see when you look at the response in the console, what gets returned is more than just one flight. There are multiple flights with the same number flying for different airlines every day:
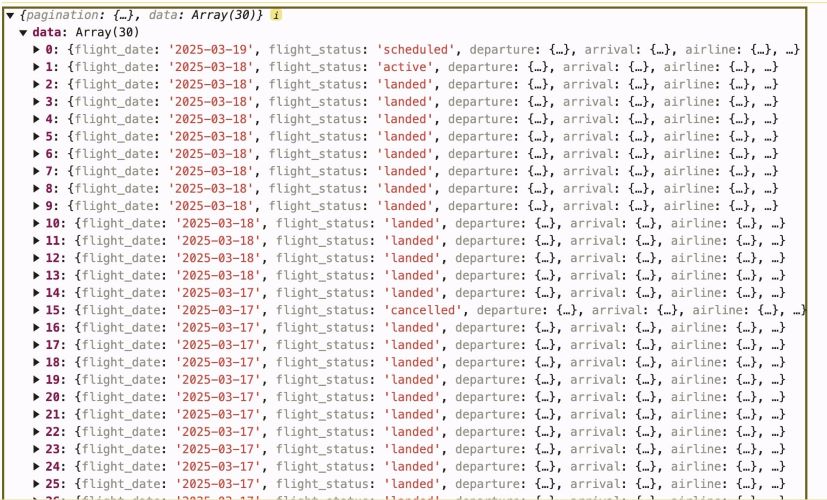
So we’ll need a little more information to show the user the right thing. Let’s append an airline parameter to the request, so the API knows exactly which airline we’re looking for:
					const FLIGHT = "8727";
const AIRLINE = "Shenzhen Airlines";
...
//inside pullFlightData
const QUERY_STRING = `?access_key=${ACCESS_KEY}&flight_number=${FLIGHT}&airline_name=${AIRLINE}`
...
const response = await fetch(BASE_URL + QUERY_STRING);
For now, we’re hardcoding the airline and flight number – later, we’ll have the user input this information.
Getting the Right Date
This query returns a much smaller array of 3 results – yesterday’s flight, today’s flight, and tomorrow’s flight. For the purposes of this tutorial, let’s assume that our user is looking for information about today’s flight, and filter that array down to show just today’s flight.
Note: the AviationStack API can do this for you if you append a flight_date parameter – however you need to upgrade to the Basic plan.
Creating a DateHelper
To filter down the array to just today’s result, first, we need today’s date, formatted to match the API response To get that, we’ll install a Javascript date library called Moment.js and use the format function to get an ISO string of today’s date in the same format as the API. Then we’ll use find to pull out the result with the matching date.
To install Moment:
$ yarn add moment
Next, create a file called FlightHelper.js and write a getTodaysFlight function to do this work. We’ll import this helper into App.jsx and use it in our component.
					//inside FlightHelper
import moment from "moment"


export const getTodaysFlight = (flights) => {
   const today = moment().format("YYYY-MM-DD");
   return flights.find((flight) => flight.flight_date === today)
}

//inside App.jsx
import { getTodaysFlight } from './FlightHelper';
...
//inside pullFlightData
 const json = await response.json();
 const todaysFlight = getTodaysFlight(json.data);
Displaying the Data
To display the data, we’ll create a flight data visualization table that lays everything out in an easy-to-read format. We first need to add the data from the API into state. Then we’ll interpolate the values from state into our JSX so they update when the state changes.
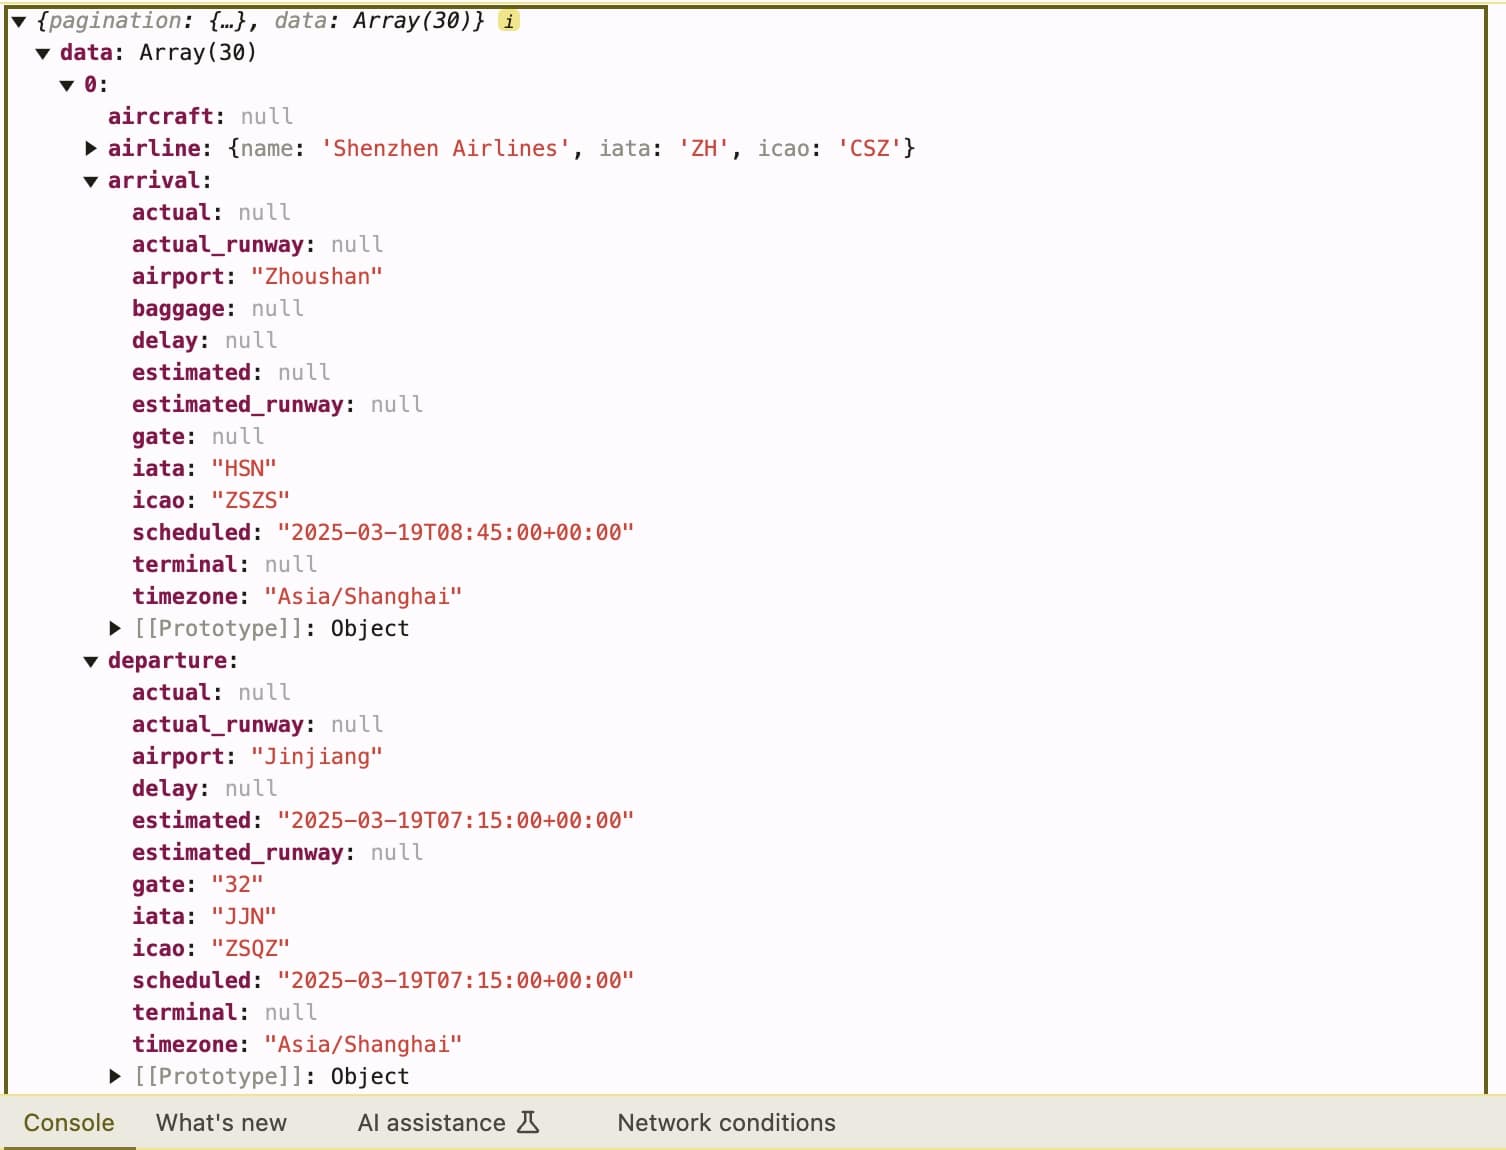
Let’s focus on showing the user the departure time, arrival time, terminals and gates, and the flight status. You can see that all of these are returned in the response we got back from Aviationstack by expanding the first result in the console:
Updating State
First, create a state object to hold the values we want to display.
					import { useEffect, useState } from 'react'; // added useState


...
//inside component
 const [flightData, setFlightData] = useState({
   departureTime: "",
   departureGate: "",
   arrivalTime: "",
   arrivalGate: "",
   flightStatus: ""
 })
Building the Elements
Add the following code to the JSX returned by the component, between the header tags:
					  <p><b>Departure:</b> {flightData.departureTime} <b>Gate:</b> {flightData.departureGate}</p>
       <p><b>Arrival:</b> {flightData.arrivalTime} <b>Gate:</b> {flightData.arrivalGate}</p>
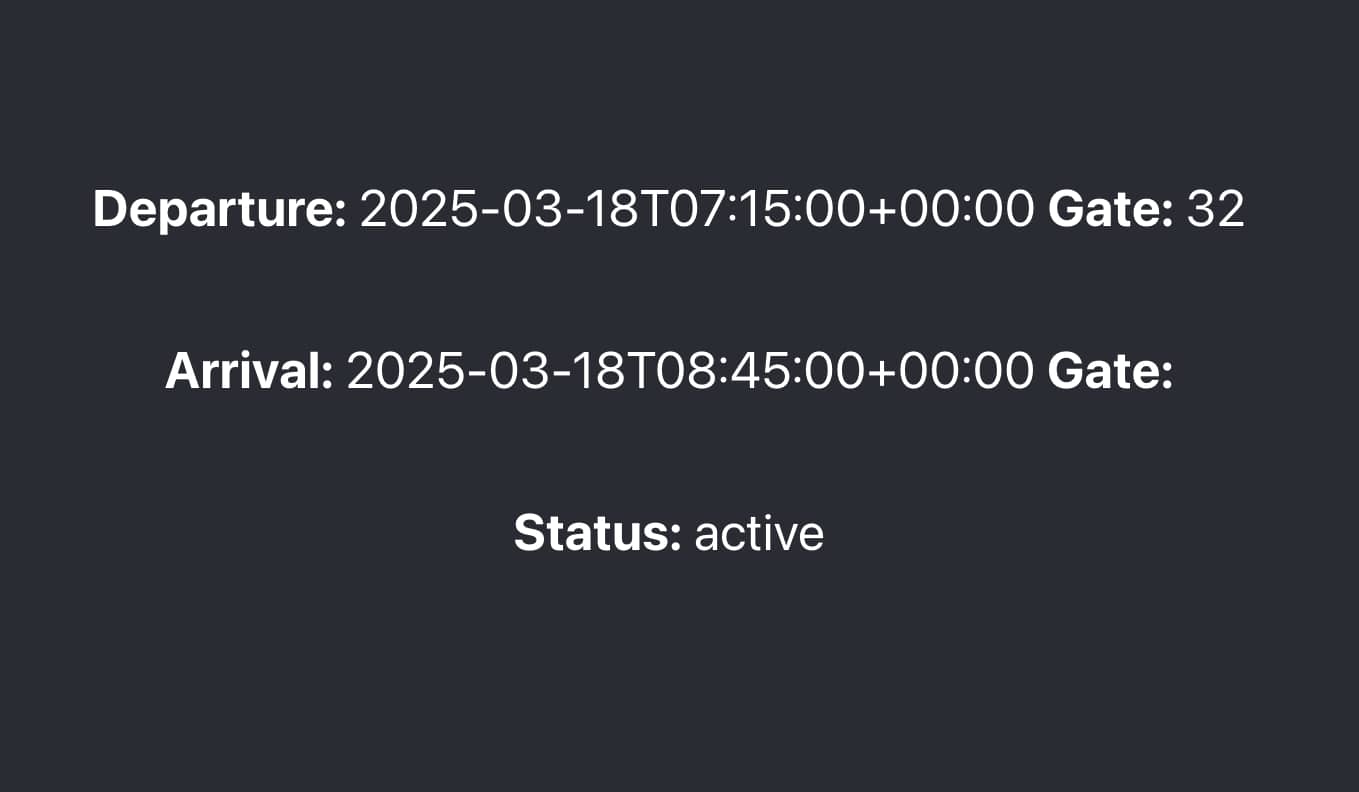
Reload the app, and you should now see the data from today’s flight displayed in the UI.
This isn’t particularly useful as-is. Let’s format the timestamps to be more readable and add some padding to lay things out better. We’ll also render the status a different color based on what stage it’s in, and display the airline and flight number.
Formatting the Timestamps
We’ll use our Moment library and write another helper function in the FlightHelper.js file to format our departure and arrival times into a more easy-to-read form. Add a new export to the FlightHelper file for the following function:
					export const formatDeptArrTime = (timestamp) => {
   return timestamp ? moment(timestamp).format('LT') : ""
}
This will cut the date information from the timestamp, and return just the time, in the format of HH:MM Am/Pm. Check out the Moment Documentation for more on the Moment Library.
Adding Style
Wrap the existing <p> tags in your JSX in some enclosing divs and add an “info-block” className. Next, wrap everything in one single outer div, and give that a “flight-info” className. It should look like this:
					<div className="flight-info">
         <div className="info-block">
           <p><b>Dept:</b> {formatDeptArrTime(flightData.departureTime)} </p>
           <p><b>Gate:</b> {flightData.departureGate}</p>
         </div>
         <div className="info-block">
           <p><b>Arr:</b> {formatDeptArrTime(flightData.arrivalTime)} </p>
           <p><b>Gate:</b> {flightData.departureGate}</p>
         </div>
         <div className="info-block">
           <p><b>Status:</b> {flightData.flightStatus}</p>
         </div>
       </div>
Here, we’re also passing our arrival and departure times to our formatDeptArrTime formatting function. In the App.css file, we’ll add CSS to create borders around the divs, add padding to unify their size, and use the flex value to position their contents. We’ll also do some conditional rendering to change the color of the status line based on its value.
Here’s the CSS code:
					.flight-info {
 border: 1px solid black;
 padding: 2rem;
 width: 50%;
}
.info-block {
 display: flex;
 justify-content: space-between;
 border: 1px solid black;
 padding: 2rem;
}
.red {
 color: red;
}
.green {
 color: green;
}
.yellow {
 color: yellow;
}
And the conditional formatting:
					const getClassNameForStatus = (status) => {
   switch(status) {
     case "scheduled":
       return "yellow";
       break;
     case "active":
       return "green";
       break;
     case "delayed":
       return "red";
     default:
       return "white";
   }
 }
...
//JSX
<div className="info-block">
 <p className={`${getClassNameForStatus(flightData.flightStatus)}`}><b>Status:</b> {flightData.flightStatus}</p>
</div>
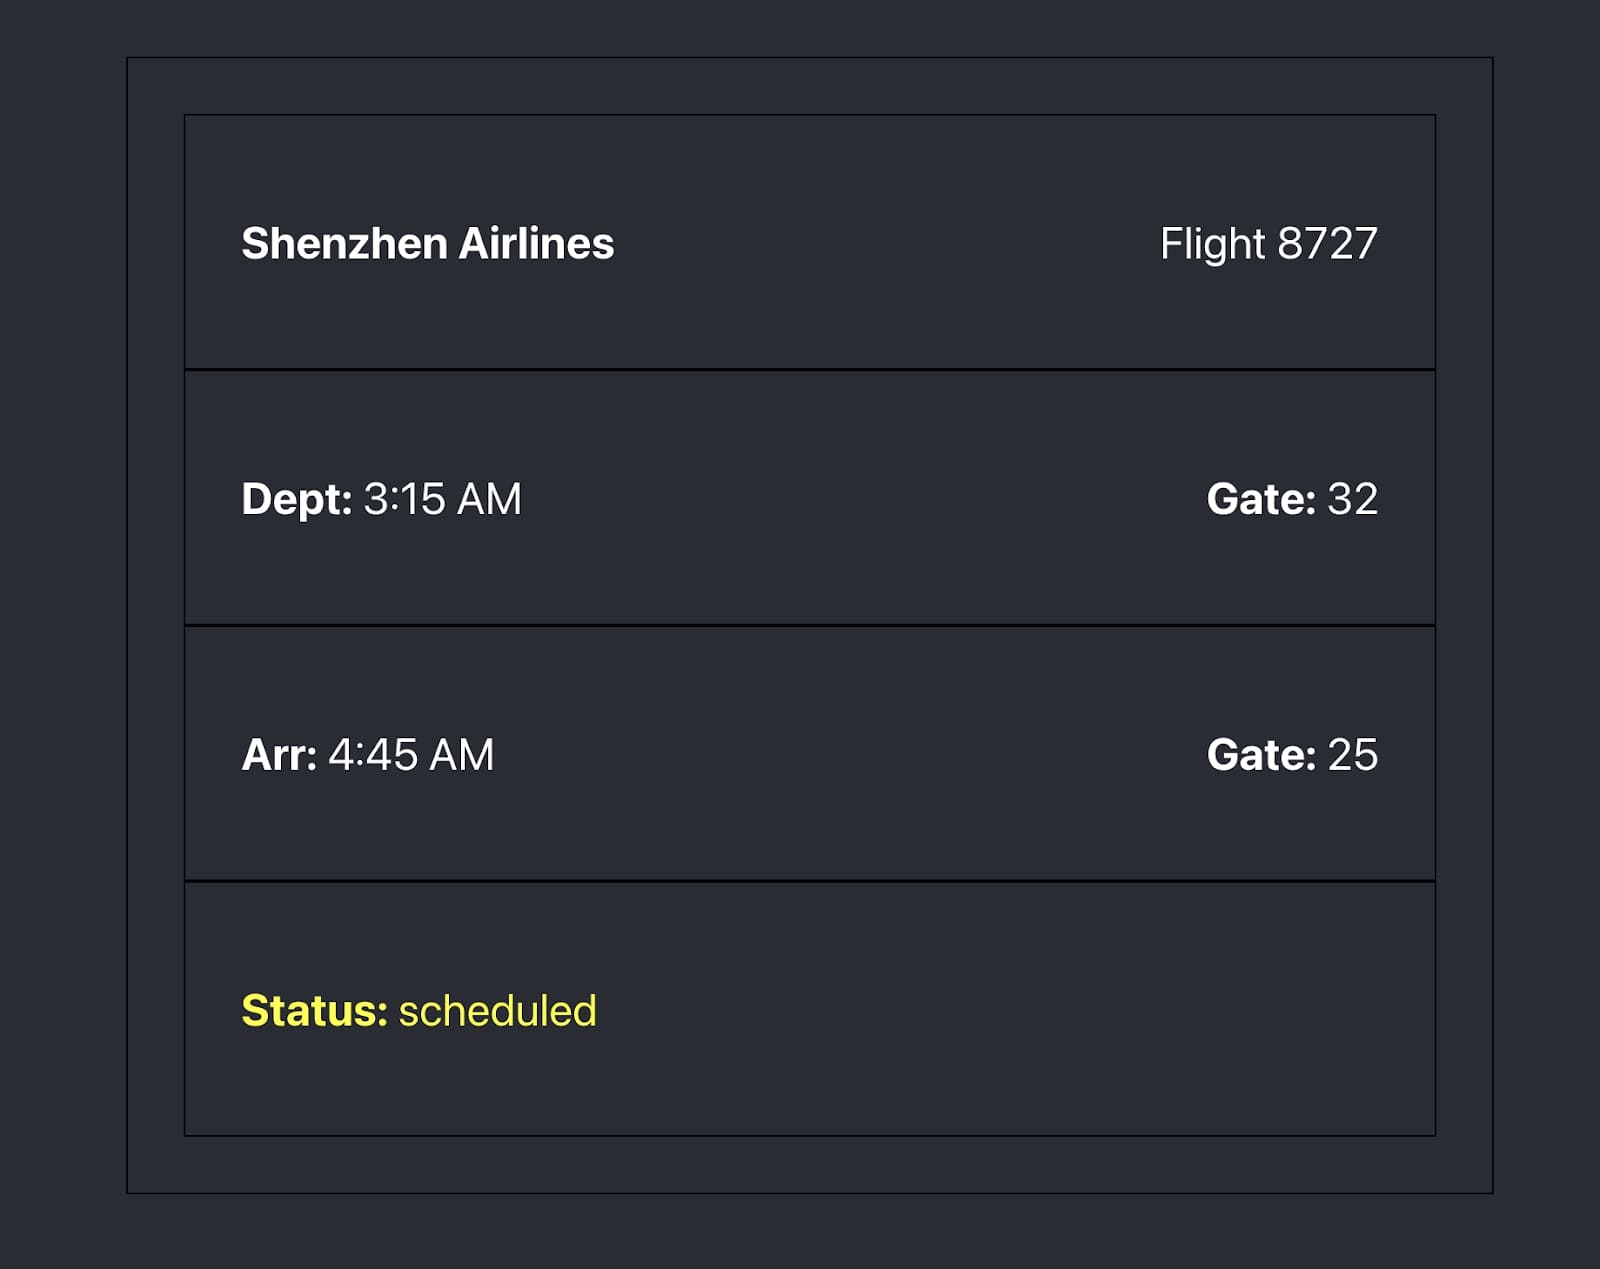
Head back to the browser and you should see that we now have a much more readable layout (we’ve hardcoded the airline and flight number here, but in the next step we’ll add those dynamically once we’ve accepted the user’s input.)
Making it Searchable
This looks great, but right now it only displays hardcoded data. To make it usable, we need the user to input their own flight number and airline. We’ll give them two text inputs to do that, and a button to send the request. Then we can send their information to the API and render what it returns.
Adding a Text Input
Put the text inputs below your enclosing div in the JSX. We’ll need to capture whatever the user enters into this input into state, so let’s also create a value in state for that. Finally, we’ll need an event handler to update state when the user types.
Here’s what that looks like:
					//setting the state
const [userFlightNumber, setUserFlightNumber] = useState("");
 const [userAirline, setUserAirline] = useState("");


//change handlers
 const updateUserFlightNumber = (event) => {
   setUserFlightNumber(event.target.value);
 }


 const updateUserAirline = (event) => {
   setUserAirline(event.target.value);
 }


//JSX
<div className="input-block">
  <input type='text' onChange={updateUserAirline} placeholder='Enter your airline'></input>
  <input type='text' onChange={updateUserFlightNumber} placeholder='Enter your flight number'></input>
</div>


//stylesheet
.input-block {
 display: flex;
 justify-content: space-around;
 padding: 2rem;
}
Adding a Button
Finally, we’ll send the captured user data to the API. Add a button below your two text inputs, and hook up the onClick handler to your pullFlightData function. Instead of appending the hardcoded values to the query string, you’ll now pass the userFlightNumber and userAirline values from your state.
You can also delete the useEffect that we were using to call the function on mount before.
Here’s what that looks like:
					//delete this
 useEffect(() => {
   pullFlightData()
 },[])


//inside pullFlightData
const QUERY_STRING = `?access_key=${ACCESS_KEY}&flight_number=${userFlightNumber}&airline_name=${userAirline}`


//JSX
<button onClick={pullFlightData}>Find My Flight</button>
We’re also going to add the user-input data to our header, remove the hardcoded values, and render the header conditionally:
					//JSX (these used to display our hardcoded FLIGHT and AIRLINE values)
       {
           shouldDisplayHeader && (
             <div className="info-block">
             <p><b>{userAirline}</b></p>
             <p>Flight {userFlightNumber}</p>
           </div>
           )
         }
//state (for conditional rendering)
 const [shouldDisplayHeader, setShouldDisplayHeader] = useState(false);
//update this to true once the user hits the button to send the API request.
Putting it All Together
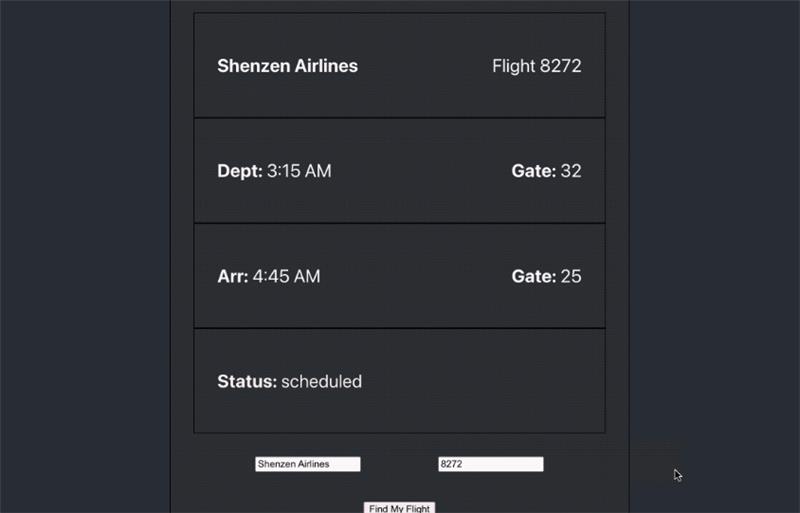
We now have a fully-functional, searchable, real-time flight status board! Head back to your browser to test it out and see it in action. Here’s ours:
And here’s the complete code for all three parts: the App.jsx file, the FlightHelper file, and the App.css stylesheet.
App.jsx
					import './App.css';
import { useState } from 'react';
import { getTodaysFlight, formatDeptArrTime } from './FlightHelper';


const ACCESS_KEY = "YOUR ACCESS KEY";
const BASE_URL = "https://api.aviationstack.com/v1/flights";


function App() {


 const [flightData, setFlightData] = useState({
   departureTime: "",
   departureGate: "",
   arrivalTime: "",
   arrivalGate: "",
   flightStatus: ""
 })


 const [userFlightNumber, setUserFlightNumber] = useState("");
 const [userAirline, setUserAirline] = useState("");
 const [shouldDisplayHeader, setShouldDisplayHeader] = useState(false);


 const pullFlightData = async () => {
   const QUERY_STRING = `?access_key=${ACCESS_KEY}&flight_number=${userFlightNumber}&airline_name=${userAirline}`
   try {
     const response = await fetch(BASE_URL + QUERY_STRING);
     if (!response.ok) {
       throw new Error(`Response status: ${response.status}`);
     }
     const json = await response.json();
     const todaysFlight = getTodaysFlight(json.data);
     setFlightData({
       departureTime: todaysFlight.departure.scheduled,
       departureGate: todaysFlight.departure.gate,
       arrivalTime: todaysFlight.arrival.scheduled,
       arrivalGate: todaysFlight.arrival.gate,
       flightStatus: todaysFlight.flight_status
     })
     setShouldDisplayHeader(true);
   } catch (error) {
     console.error(error.message);
   }
 }


 const getClassNameForStatus = (status) => {
   switch(status) {
     case "scheduled":
       return "yellow";
       break;
     case "active":
       return "green";
       break;
     case "delayed":
       return "red";
     default:
       return "white";
   }
 }


 const updateUserFlightNumber = (event) => {
   setUserFlightNumber(event.target.value);
 }


 const updateUserAirline = (event) => {
   setUserAirline(event.target.value);
 }


 return (
   <div className="App">
     <header className="App-header">
       <div className="flight-info">
         {
           shouldDisplayHeader && (
             <div className="info-block">
             <p><b>{userAirline}</b></p>
             <p>Flight {userFlightNumber}</p>
           </div>
           )
         }
         <div className="info-block">
           <p><b>Dept:</b> {formatDeptArrTime(flightData.departureTime)} </p>
           <p><b>Gate:</b> {flightData.departureGate}</p>
         </div>
         <div className="info-block">
           <p><b>Arr:</b> {formatDeptArrTime(flightData.arrivalTime)} </p>
           <p><b>Gate:</b> {flightData.arrivalGate}</p>
         </div>
         <div className="info-block">
           <p className={`${getClassNameForStatus(flightData.flightStatus)}`}><b>Status:</b> {flightData.flightStatus}</p>
         </div>
         <div className="input-block">
           <input type='text' onChange={updateUserAirline} placeholder='Enter your airline'></input>
           <input type='text' onChange={updateUserFlightNumber} placeholder='Enter your flight number'></input>
         </div>
         <button onClick={pullFlightData}>Find My Flight</button>
       </div>
     </header>
   </div>
 );
}


export default App;
FlightHelper.js
					import moment from "moment"


export const getTodaysFlight = (flights) => {
   const today = moment().format("YYYY-MM-DD");
   return flights.find((flight) => flight.flight_date === today)
}


export const formatDeptArrTime = (timestamp) => {
   return timestamp ? moment(timestamp).format('LT') : ""
}
App.css
					.App {
 text-align: center;
}


.App-header {
 background-color: #282c34;
 min-height: 100vh;
 display: flex;
 flex-direction: column;
 align-items: center;
 justify-content: center;
 font-size: calc(10px + 2vmin);
 color: white;
}


.flight-info {
 border: 1px solid black;
 padding: 2rem;
 width: 50%;
}


.info-block {
 display: flex;
 justify-content: space-between;
 border: 1px solid black;
 padding: 2rem;
}


.input-block {
 display: flex;
 justify-content: space-around;
 padding: 2rem;
}


.red {
 color: red;
}


.green {
 color: green;
}


.yellow {
 color: yellow;
}
Conclusion
There are many places you could take this aviation API tutorial from here. For starters, we haven’t added much error handling – for now we just log the errors in the console, but it would be great to show the user an error message if something goes wrong.
Next, we could add the ability to search for flights on different days, so the user can look for a flight tomorrow or next week. We could also render the amount of time that a flight has been delayed.
Take a look at the AviationStack documentation to check out the other endpoints and see what additional functionality you could build on your own!
Frequently Asked Questions
What is Aviationstack API used for?
Aviationstack is a REST API that provides real-time flight tracking data, historical flight data, airline details, airport information, and more. It’s widely used in travel apps, airline dashboards, logistics platforms, and especially in building a real-time flight tracking app for monitoring live flight statuses.
What is the best flight tracking API for developers?
Aviationstack stack is one of the leading flight tracking APIs, offering comprehensive aviation data with a free tier that includes 100 API requests per month. It provides real-time flight status, departure/arrival information, airline details, and global coverage across major airports and airlines world wide-perfect for developers building a real-time flight tracking app.
Is the Aviationstack API free?
Yes, Aviationstack offers a free tier with up to 100 API requests per month. For higher usage and access to advanced filters like flight date or route-based queries, upgrade to a paid plan.
How do I query a specific flight?
Use the flight_number and airline_name parameters in the /flights endpoint, along with your access key. Optionally filter by flight_date on a paid plan for precise results.
Can I use Aviationstack with other frontend frameworks?
Yes, while this guide uses React, Aviationstack works with any frontend or backend framework, including Vue.js, Angular, Node.js, Django, and more-ideal when creating a real-time flight tracking app.
How can I integrate alerts or notifications?
You can build additional logic using services like Firebase, Twilio, or Novu to trigger alerts based on changes in the flight_status field from the API response.
🚀 Explore More Exciting Real-Time API Projects!
If you enjoyed building a real-time flight tracker, you’ll love these related guides to enhance your applications even further:
🔔 Build a Real-Time News App with Mediastack API – Learn how to integrate live news updates into your projects with ease.
🌦️ Integrate a Real-Time Weather Dashboard Using Weatherstack API – Discover how to display up-to-date weather information in your app.
🤖 Build Location-Aware AI Chatbots with IPStack – Create smarter chatbots that adapt to your users’ locations in real time.
👉 Start building smarter apps today by checking out these easy-to-follow tutorials!