
Fraud detection is a key concern for any online business. Whether you’re detecting bot activity or securing your users’ payments through an online checkout platform, you must build an IP-Based Fraud Detection System into your API – not only to secure your own data, but also the data of your users.
In this article, we’ll answer some common questions about fraud detection and learn how to implement basic IP-based fraud detection with IPstack’s security module.
Table of Contents
You Will Learn:
- How IP-based fraud detection works using geolocation and proxy signals
- How to integrate IPstack’s Security Module into your backend
- How to calculate a real-time IP fraud score using weighted rules
- How to simulate and test IPs behind proxies, VPNs, and Tor
- How to build a working Node.js backend for scoring IP threat levels
- How to future-proof your fraud detection system with machine learning
Common Questions About IP-Based Fraud Detection
What is IP-based fraud detection?
IP-based fraud detection works by analyzing the IP address of an incoming network request and assigning an “IP fraud score” based on suspicious anomalies or patterns that could indicate fraud.
An IP fraud score is assigned by feeding the IP address through various “risk rules” or an IP risk scoring algorithm. Each data point associated with the IP address is analyzed to determine how risky it is, and then a value is either added or subtracted from the total score.
For example, if an IP geolocation scan reveals that the address originates in Russia, or another country with known high rates of fraud, that might add 10 points to the fraud score to indicate higher risk. If the IP address has been hidden behind a VPN, that could add 5 points to the score. Perhaps it’s revealed that the IP address uses a suspicious SSH connection – this may add 15 points to the score.
Once the total score has been assessed, the IP fraud system determines whether the IP address is high, medium, or low risk, based on thresholds you previously established.
Why do businesses need fraud detection systems, and how does IP geolocation help?
Online businesses need fraud detection systems to safeguard both company data and user information from malicious actors. The impact of fraud goes beyond stolen goods or services, it also leads to chargeback fees, payment processing penalties, and higher transaction costs. One effective method for fraud prevention is IP geolocation. It allows businesses to identify the origin of incoming requests and flag high-risk regions.
Countries like Venezuela, Brazil, China, South Africa, India, and Indonesia are frequently cited for high IP fraud rates, with some studies reporting that up to 33% of requests from Venezuela are fraudulent. Detecting traffic from such regions can serve as an early warning signal for potentially fraudulent activity.
Build a Real-Time Fraud Detection System with IPstack
Prerequisites
This real-time fraud monitoring tutorial assumes working knowledge of React and experience making API requests. You’ll use IPstack’s Security Module to analyze incoming IPs, and Node.js with Express to build a backend for fraud scoring.
Step One: Setting Up IPstack with Security Features
IPstack is a geolocation API that provides accurate and reliable geolocation data for any IP address, in JSON format, via secure HTTPS network calls.
Sign Up for a Plan
There are several membership tiers available, including a free tier that allows up to 100 requests per month. To access advanced security features and detect suspicious IP addresses, you need a Professional Plus Plan. Sign up for an IPstack account to get your API key.
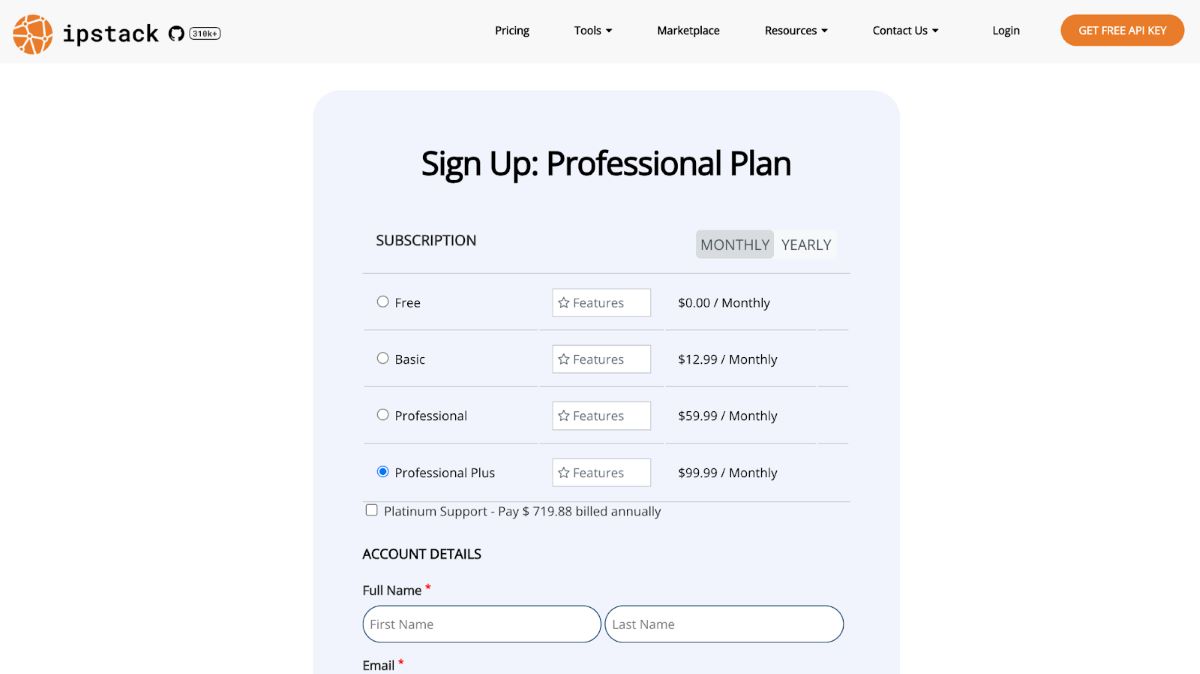
Once you sign up, head to your IPstack dashboard to retrieve your API key. From there, check out the documentation to enable the Security Module by appending &security=1 to your requests.
Send a Test API Request
To access the advanced Security Module, all you have to do is append &security=1 as a query parameter to your request string. IPstack provides a handy link for testing the API and viewing the output. Find the “Run API Request” button in the “Enable Security Module” section of the documentation to test it:
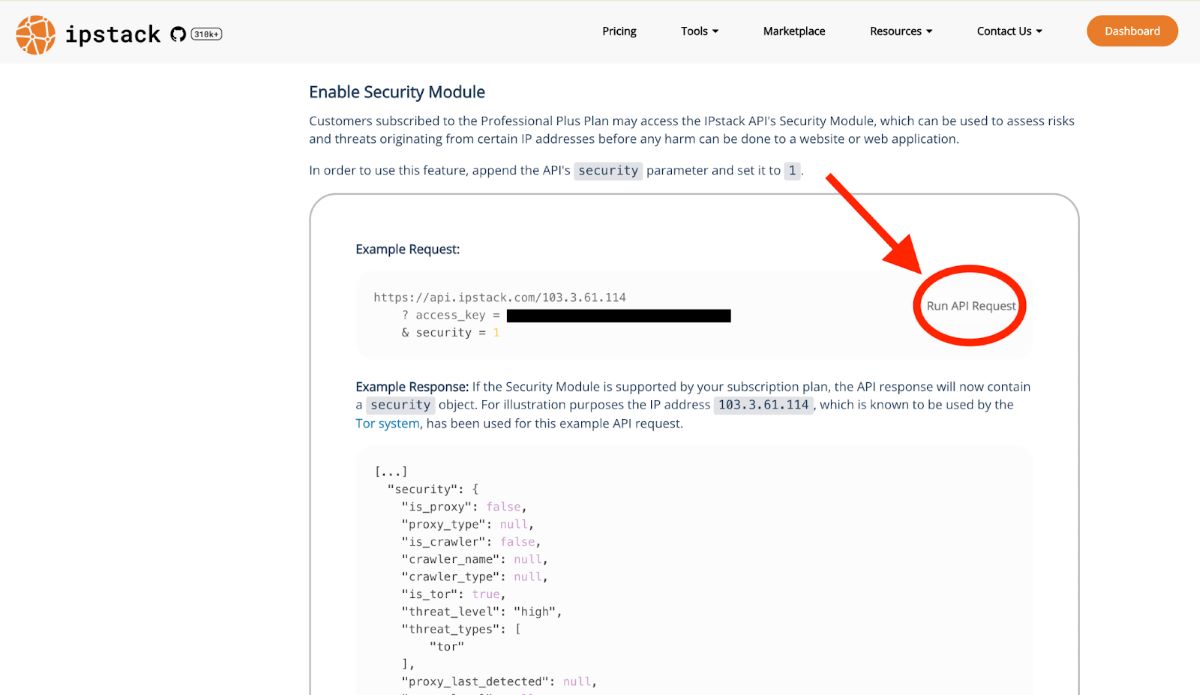
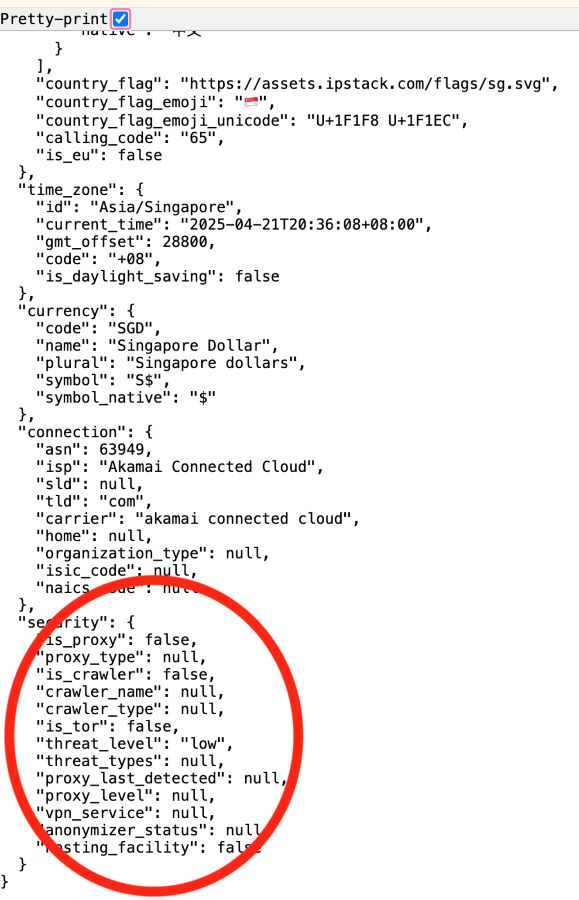
This will send an example request to the API, using an IP address used by the Tor system, appending your access key and the security parameter. The output will be loaded into a new browser tab. Pretty print the JSON output to view the results, and scroll to the bottom to see the additional security data:
Step Two: Building an IP Risk Scoring Algorithm
Once you have the data from the API, it’s up to you to build a scoring system to determine whether the IP address is high risk, medium, or low risk. The thresholds you set are up to you, and will depend on the level of risk you are comfortable with for your business.
Create a Weight System
Using your own domain knowledge, or empirical data, you can create a weighting system to determine how risky each security indicator is. Here’s the example we’ll be using for our implementation:
Feature | Risk Indicator | Risk Score |
Is_proxy | true | +15 |
proxy_level | elite | +15 |
proxy_level | anonymous/distorting | +10 |
proxy_level | transparent | +5 |
proxy_type | Tor | +20 |
proxy_type | SOCKS, Web, Privacy Proxy | +10 |
is_tor | true | +20 |
is_crawler | true | +15 (unless known benign crawler) |
crawler_type | malicious or unknown | +10 |
threat_level | high | +25 |
threat_level | medium | +15 |
threat_level | low | +5 |
threat_types | includes attack, malware, fraud | +20 |
anonymizer_status | Active | +15 |
anonymizer_status | Suspect | +10 |
anonymizer_status | Inactive | +5 |
anonymizer_status | Private | +10 |
proxy_last_detected | within last 30 days | +10 |
vpn_service | known VPN provider | +10 |
hosting_facility | true | +10 |
Assigning scores to different indicators is all about assessing how “suspicious” a behavior or pattern is, based on historical fraud trends, threat intelligence, and industry best practices. Let’s break down a few of these weights and explain why we’ve assigned the scores we did.
is_proxy, proxy_level and proxy_type
Together, these tell us whether the user is using a proxy or VPN service to obscure their IP address. Using a proxy is suspicious, but depending on the proxy type or proxy level, may be more or less suspicious. Elite-level proxies implemented by Tor are most often associated with fraud, scraping, and abuse.
threat_level and threat_type
These are threat-intelligence based labels, and a high threat level typically indicates known bad actors. Specific types like attack, malware and fraud are heavily weighted because they indicate confirmed malicious activity.
anonymizer_status and proxy_last_detected
If anonymizer_status is active or a proxy was detected within the last 30 days, these are both indicators of recently-confirmed suspicious activity, which is a red flag.
vpn_service and hosting_facility
Depending on the VPN service or hosting facility used, different weights might be assigned. These days, lots of users use VPNs to hide their IPs, and most well-known commercial VPN services don’t need to be flagged. However, IPs from hosting facilities like AWS or Digital Ocean are often used by bots or scrapers, not by individuals.
Step Three: Implementing Real-Time Detection
To utilize this scoring system in your app, you’ll need to build an IP security module in your back end to detect suspicious IP addresses in each incoming request. Let’s walk through a basic implementation of this on a Node.js back end. Once we finish this tutorial, you’ll have a server that is able to handle incoming requests and evaluate the threat posed by that request based on its IP address.
Get Started with Express
We’re going to spin up a Node backend using Express – a framework for quickly setting up servers on Node. If you’re unfamiliar with Node or Express, check out the documentation here.
First let’s set up our project structure and install express.
					$ mkdir fraud-detection-app
$ cd fraud-detection-app && mkdir server
$ cd server && npm init
$ npm install -s express
$ touch index.js
Open the project in your code editor and navigate to the index.js file. This is where we’ll build our server and set up the route that will handle incoming network requests. Add the following code:
					const express = require('express')
const app = express()
const port = 3000


app.get('/api/fraud-score', (req, res) => {
 res.send('Hello World!')
})


app.listen(port, () => {
 console.log(`Example app listening on port ${port}`)
})
This imports the Express dependency, uses Express to create the server (called app), assigns it to a port, and establishes an endpoint called api/fraud-score. For now, all this endpoint does is send a stringified response.
Test the endpoint by starting up the server in your terminal:
$ node index.js
and navigating to localhost:3000/api/fraud-score in your browser. You should see the following in your browser window:

Eventually, this endpoint will be responsible for real-time fraud monitoring by scoring incoming networks requests and assigning a fraud score. Here’s a step-by-step breakdown of how that will go:
- accept the incoming request from our frontend
- forward the IP address of that request to the IPstack security implementation API
- receive a response from the API that includes security data
- analyze the security data using an IP risk scoring algorithm we create using the weights above
- determine the threat level of the request and assign a fraud score
- return the fraud score to the front end so the front end can either deny or allow the user to proceed
Before we can do that, we need to secure our API access key so the backend can use it to send requests to the API.
Create a Dotenv File
To store the API access key securely, we’ll install the Dotenv dependency, create a .env file in the server folder, and add the key to it. Then, you can access the key in your backend requests using process.env. Run the following in your root directory:
					$ npm install -s dotenv
$ cd server && touch .env
This will add the dependency and create the file. In the file, let’s add our access key and API URL:
					API_ACCESS_KEY="your access key"
API_URL="https://api.ipstack.com"
In index.js, initialize Dotenv at the top of the file, and you’ll be able to grab the key and URL from process.env:
					require('dotenv').config()
const BASE_URL = process.env.API_URL;
const ACCESS_KEY = process.env.API_ACCESS_KEY;
Finally, create a .gitignore file in the root of your project, and add the .env file to it. This tells git to ignore the file during a commit, so that file will never be pushed to an online repository. If you deploy the app to a platform like AWS, Digital Ocean, Github pages, or Heroku, you can manually add these secret values through the provided interface.
Step Four: Set Up a Reverse Proxy with Nginx
It’s easy to grab the incoming IP address from the request object that Express provides:
					app.get('/api/fraud-score', (req, res) => {
   const ip = req.ip;
   console.log(ip);
   // send the IP to IPstack
   // analyze the response and assign a fraud score
   res.send('Your fraud score is: __')
})
The problem is that if we send a request from our browser in development, the IP address we get will be ::1, the IPv6 address for the localhost, which isn’t very useful. We can’t send this to IPstack for fraud testing because it isn’t a public IP address. We need to simulate a production environment so we can get a public-facing IP address. For that, we’ll set up a reverse proxy with Nginx.
Install Nginx
Run the following command in your terminal to install Nginx using Homebrew:
$ brew install nginx
Configure Nginx
Open the default config file (on Mac this is /opt/homebrew/etc/nginx/nginx.conf) in your code editor, and add the following block of configuration:
					http {
    # ... other configs ...

    server {
        listen 8080;

        location / {
            proxy_pass http://localhost:3000;

            # simulate client IP
            proxy_set_header X-Forwarded-For 103.3.61.114;

            # required by express if trust proxy is on
            proxy_set_header Host $host;
            proxy_set_header X-Real-IP $remote_addr;
        }
    }
}
This will spin up a proxy server that listens on port 8080 and forwards the request to our Express server on port 3000. It attaches a “real” simulated client IP to the request, which we can then send to IPstack. For testing purposes, we’ve used the same IP address that IPstack uses in its security documentation, which is the Tor system IP.
Start Nginx
$ brew services start nginx
Tell Express to Trust the Proxy
In your index.js file, add the following line to tell Express to trust the incoming proxied request from Nginx:
app.set('trust proxy', true)
Now, instead of visiting the app at localhost:3000/api/fraud-score in your browser, you’ll visit localhost:8080/api/fraud-score. You should see the Tor IP address logged to the terminal, and the same “Hello World!” message printed in the browser window.

NOTE: sometimes installing Nginx can mess with your Node installation. If you’re getting “command not found: Node” when trying to run the server now, try linking it again by running brew link node.
Step Five: Send the IP Address to IPstack
We have the IP address from the incoming request, all we need to do is forward it to IPstack and receive the response. To do this, we’ll construct a URL from our dotenv values, and append the IP address and the &security=1 flag to the parameters:
					app.get('/api/fraud-score', async (req, res) => {
   const ip = req.ip;
   const response = await fetch(BASE_URL + `/${ip}?access_key=${ACCESS_KEY}&security=1`);
   const json = await response.json();
   console.log(json);
   res.send('Hello World!')
})
Take a look at your terminal to view the data object returned to us by the IPstack fraud prevention API:
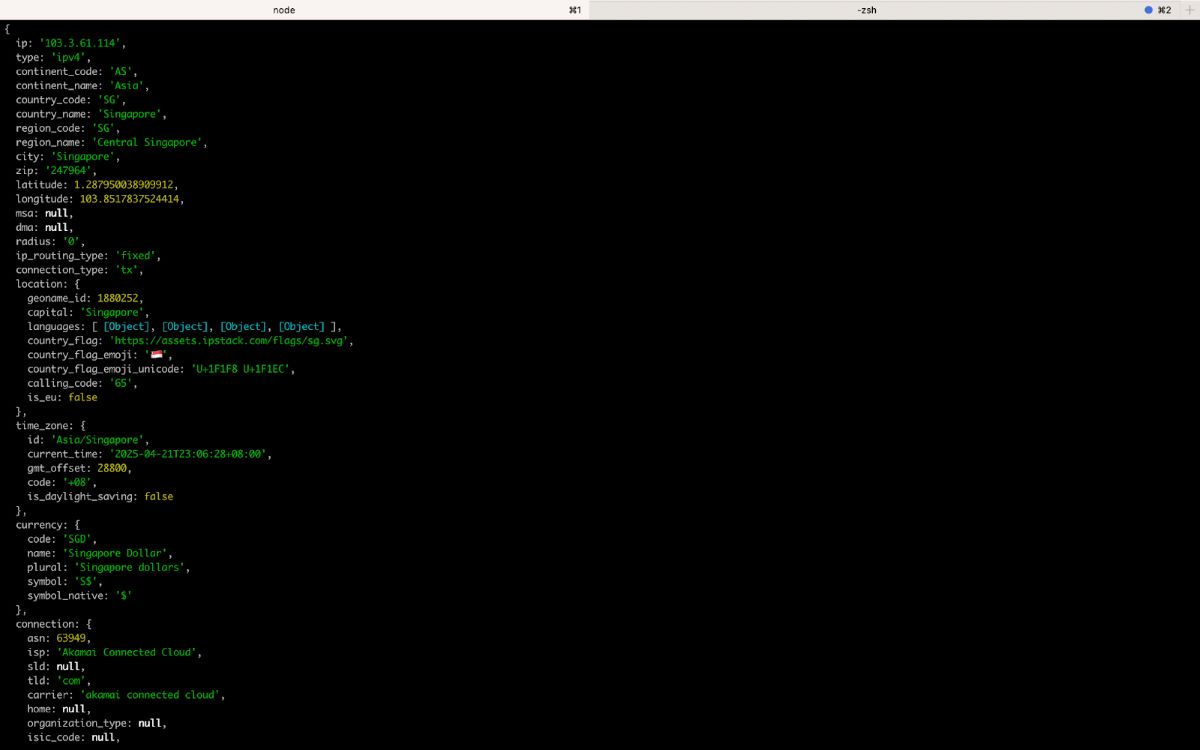
The next step is to write the IP risk scoring algorithm that will assign weights to the values we received, and total up those weights into a fraud score.
Step Six: Write a Risk Assessment Algorithm
In your terminal, run the following command to create a service file, which is where we’ll write our scoring function:
$ touch fraud-score.js
Make sure you’re in the server directory of your app. Inside this file, paste the following function:
					export function calculateFraudScore(security) {
   let score = 0;
    if (security.is_proxy) score += 15;
    switch (security.proxy_level) {
     case 'elite': score += 15; break;
     case 'anonymous':
     case 'distorting': score += 10; break;
     case 'transparent': score += 5; break;
   }
    if (security.proxy_type === 'Tor') score += 20;
   if (['SOCKS', 'Web', 'Privacy Proxy'].includes(security.proxy_type)) score += 10;
    if (security.is_tor) score += 20;
    if (security.is_crawler && security.crawler_type !== 'benign') score += 15;
    switch (security.threat_level) {
     case 'high': score += 25; break;
     case 'medium': score += 15; break;
     case 'low': score += 5; break;
   }
    const riskyThreats = ['attack', 'malware', 'fraud'];
   if (security.threat_types && security.threat_types.some(t => riskyThreats.includes(t))) {
     score += 20;
   }
    switch (security.anonymizer_status) {
     case 'Active': score += 15; break;
     case 'Suspect': score += 10; break;
     case 'Inactive': score += 5; break;
     case 'Private': score += 10; break;
   }
    const lastDetectedDays = daysSince(security.proxy_last_detected);
   if (lastDetectedDays !== null && lastDetectedDays <= 30) score += 10;
    if (security.vpn_service) score += 10;
    if (security.hosting_facility) score += 10;
    return {
     raw_score: score,
     risk_level: getRiskLevel(score)
   };
 }
  function daysSince(dateString) {
   if (!dateString) return null;
   const then = new Date(dateString);
   const now = new Date();
   const diffTime = Math.abs(now - then);
   return Math.floor(diffTime / (1000 * 60 * 60 * 24));
 }
  function getRiskLevel(score) {
   if (score >= 76) return 'Severe';
   if (score >= 51) return 'High';
   if (score >= 21) return 'Moderate';
   return 'Low';
 }
This runs down the list of weights we established earlier, and totals up a fraud score based on those weights. The helper function daysSince helps us evaluate the time since proxy activity was last detected, and getRiskLevel returns a standardized response of either Severe, High, Moderate, or Low, which we’ll pass to our front end, along with the raw score number.
Import this function into index.js and pass it the security object we received from the API:
					const { calculateFraudScore } = require('./fraud-score');
...


app.get('/api/fraud-score', async (req, res) => {
   const ip = req.ip;
   const response = await fetch(BASE_URL + `/${ip}?access_key=${ACCESS_KEY}&security=1`);
   const json = await response.json();
   const fraudScore = calculateFraudScore(json);
   res.send(fraudScore)
})
Now, when you visit localhost:8080/api/fraud-score in your browser, you should see the following:
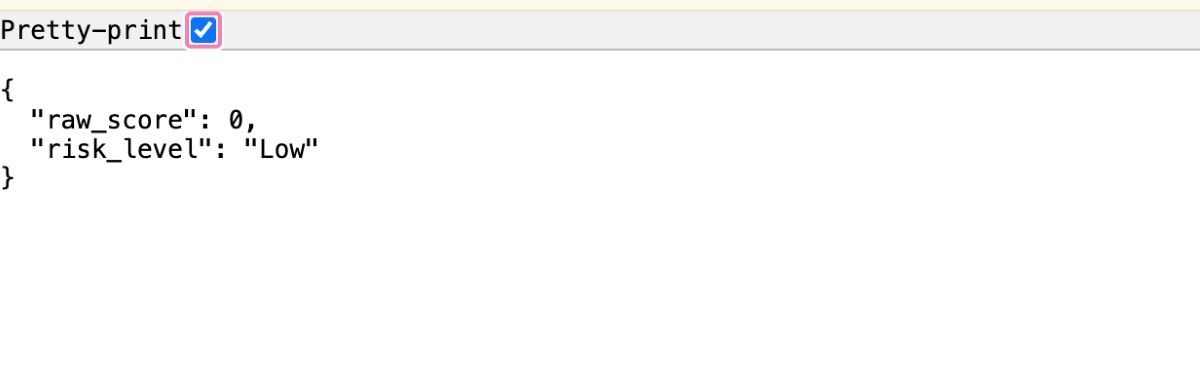
Nice! We’ve built a fraud prevention API that handles an incoming request from the client, forwards the IP address of that request to IPstack, and uses the security data IPstack returns to us to create a fraud score for that IP address.
Next Steps
You can now use this backend to check incoming requests from any front end you build. Why not check out the How to Build a Secure User Registration System with Mailboxlayer Email Validation tutorial, and hook up that front end to this server? Create a client directory next to your server directory and build the front end login page there. Validate the user’s email as the first step, then assess their threat level using their IP as step two.
Complete Code
Here’s the full IP security module implementation.
index.js
					require('dotenv').config()
const BASE_URL = process.env.API_URL;
const ACCESS_KEY = process.env.API_ACCESS_KEY;


const express = require('express');
const { calculateFraudScore } = require('./fraud-score');
const app = express()
app.set('trust proxy', true)
const port = 3000


app.get('/api/fraud-score', async (req, res) => {
   const ip = req.ip;
   const response = await fetch(BASE_URL + `/${ip}?access_key=${ACCESS_KEY}&security=1`);
   const json = await response.json();
   const fraudScore = calculateFraudScore(json);
   res.send(fraudScore)
})


app.listen(port, () => {
 console.log(`Example app listening on port ${port}`)
})
fraud-score.js
					export function calculateFraudScore(security) {
   let score = 0;
    if (security.is_proxy) score += 15;
    switch (security.proxy_level) {
     case 'elite': score += 15; break;
     case 'anonymous':
     case 'distorting': score += 10; break;
     case 'transparent': score += 5; break;
   }
    if (security.proxy_type === 'Tor') score += 20;
   if (['SOCKS', 'Web', 'Privacy Proxy'].includes(security.proxy_type)) score += 10;
    if (security.is_tor) score += 20;
    if (security.is_crawler && security.crawler_type !== 'benign') score += 15;
    switch (security.threat_level) {
     case 'high': score += 25; break;
     case 'medium': score += 15; break;
     case 'low': score += 5; break;
   }
    const riskyThreats = ['attack', 'malware', 'fraud'];
   if (security.threat_types && security.threat_types.some(t => riskyThreats.includes(t))) {
     score += 20;
   }
    switch (security.anonymizer_status) {
     case 'Active': score += 15; break;
     case 'Suspect': score += 10; break;
     case 'Inactive': score += 5; break;
     case 'Private': score += 10; break;
   }
    const lastDetectedDays = daysSince(security.proxy_last_detected);
   if (lastDetectedDays !== null && lastDetectedDays <= 30) score += 10;
    if (security.vpn_service) score += 10;
    if (security.hosting_facility) score += 10;
    return {
     raw_score: score,
     risk_level: getRiskLevel(score)
   };
 }
  function daysSince(dateString) {
   if (!dateString) return null;
   const then = new Date(dateString);
   const now = new Date();
   const diffTime = Math.abs(now - then);
   return Math.floor(diffTime / (1000 * 60 * 60 * 24));
 }
  function getRiskLevel(score) {
   if (score >= 76) return 'Severe';
   if (score >= 51) return 'High';
   if (score >= 21) return 'Moderate';
   return 'Low';
 }
.env
					API_ACCESS_KEY="your access key"
API_URL="https://api.ipstack.com"
/opt/homebrew/etc/nginx/nginx.conf (for development only)
					#user  nobody;
worker_processes  1;


events {
   worker_connections  1024;
}


http {
   include       mime.types;
   default_type  application/octet-stream;


   sendfile        on;
   keepalive_timeout  65;
   server {
       listen 8080;


           location / {
               proxy_pass http://localhost:3000;


               # simulate client IP
               proxy_set_header X-Forwarded-For 103.3.61.114;


               # required by express if trust proxy is on
               proxy_set_header Host $host;
               proxy_set_header X-Real-IP $remote_addr;
       }
   }
   include servers/*;
}
Machine Learning Possibilities
As AI becomes more prevalent, online businesses that don’t take advantage of it may fall behind. Cyber security is one area in which machine learning can be incredibly valuable. For example, in IP-based fraud detection, machine learning can be used to:
- adapt to changing fraud patterns
- learn from historical data and create flexible thresholds on the fly
- reduce false positives by learning from good/bad examples
- detect subtle pattern changes
In essence, machine learning allows you to build a fraud detection system that responds to changing data, rather than simply relying on hardcoded thresholds that you must manually update.
Tools like Sci-Kit Learn, XGBoost/LightXGM, TensorFlow, and PyTorch can all be used to leverage deep learning algorithms for better pattern detection, and for prototyping on small to medium fraud datasets.
IPstack: A Powerful API for Fraud Detection
This article should have given you a basic idea of how to implement an IP fraud detection system using IP geolocation and an IP security module implementation from IPstack. Take your project to the next level by combining this back end with one of our simple front end tutorials!
FAQs
What are fraud detection rules?
Fraud detection rules are simple if/then statements that look for things like past chargebacks, weird email and IP combos, age mismatches, or content that doesn’t meet policy guidelines. They help systems decide if a request comes from a bad actor.
How does an IP address indicate fraud?
IPs can reveal use of proxies, VPNs, Tor networks, or hosting services—often used to mask identity or location. They can also originate from countries with known high levels of fraud, or indicate past incidents of fraud or abuse. Combined with threat intelligence, they help flag risky behavior.
How accurate is IP fraud detection?
It depends on the provider. Good IP intelligence sources update frequently and can spot threats within hours. But fraudsters rotate IPs fast, so detection has limits. IP-based fraud detection is a strong signal, but not the full picture. It works best when combined with device, behavioral, and transactional data. It’s important not to block solely based on an IP address without further context.
How does an IP geolocation API help with fraud prevention?
Geolocation data helps flag requests from high-risk countries, mismatched regions (e.g., billing vs. IP location), or known fraud hotspots. Combined with threat intelligence, it strengthens fraud scoring.
What is the IPstack security module?
The security module implementation offered by IPstack allows customers to intercept requests originating from certain IP addresses and assess their threat level before any harm can be done to a website or web application.
To enable the security module, you need the Professional Plus Plan activated on your IPstack account. Check out plan pricing here.
How can I tell if a user is using a proxy or VPN?
IPstack’s response includes fields like is_proxy, proxy_level, and proxy_type. These indicate if the IP is hidden or anonymized, which are often signs of suspicious activity.
Why is IP fraud detection important for ecommerce and SaaS?
It helps prevent fake accounts, spam, stolen credit card transactions, click fraud, and account takeovers. This reduces chargebacks, protects user data, and improves platform trust.
What happens if an IP is flagged as high-risk?
You can deny access, require additional verification (like CAPTCHA or 2FA), or alert your backend for manual review. Many systems assign a fraud score to trigger dynamic decisioning.