

Geocoding is a way to turn addresses into map coordinates. In this blog, we’ll explain geocoding and show you how to make a simple web app using Node.js that uses a geocoding API. But, why do we need geocoding? Many industries use it:
👉Finance
👉Health
👉Military
👉Commercial
To quickly use geocoding, you can try PositionStack. It’s a popular geocoding API that many developers and businesses trust. PositionStack covers over 2 billion addresses worldwide and handles over 1 billion geocode requests every day. It’s reliable and easy to use. We will also explore this API in the coming sections. Furthermore, we’ll show you how to get started with PositionStack, make batch requests, and use advanced features like the Country Module and Timezone Module.

Table of Contents
What is Geocoding?
Geocoding is the process that converts physical addresses into geographic coordinates. You can use geocoding to place markers on a map and discover additional geographic information.
Here is an example of geocoding:
1600 Amphitheatre Parkway, Mountain View, CA -> Latitude: 37.423021 & Longitude: -122.083739
In this tutorial, you will learn how to create a web app using Node.js that uses a geocoding RESTful API. Here is our final demo:

Why do we need Geocoding?
Most software written for health, finance, and even military systems uses geocoding functionality.
- Finance – determine demographics for fair lending efforts
- Health – use patient demographics and locations to track health issues by area
- Military – compile detailed location data and other information
- Commercial – discover the shipping patterns of the location
How To Automate Geocoding Quickly?
If you are looking for the fastest way to implement or integrate a geocoding solution into your system, positionstack is here for you.
What is positionstack?
The positionstack API is a free geocoding API trusted by developers and enterprises worldwide.
positionstack is one of the leading geocoding RESTful APIs on the market. It provides enterprise-grade functionality with a single powerful and robust API.
Why positionstack?
positiontack covers 2+ billion addresses around the world and handles 1+ billion geocode API lookups each day. It is a reliable, effective geocode service for your systems.
- Real-time Geocode
- Worldwide coverage
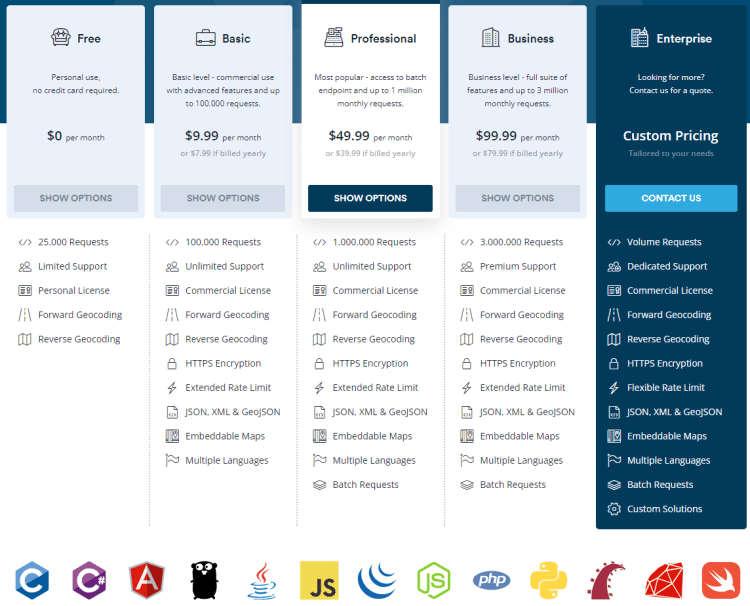
- Fair pricing & Free plan to test it out
- Scalable Infrastructure
- Reverse & Forward Geocode
- Batch Requests
- Embeddable Maps
- Integration takes less than 5 minutes
The highly scalable apilayer platform powers the positionstack API. positionstack is capable of handling billions of geocoding requests with a response time between 10 and 100 milliseconds.
How do I get started with the PositionStack API?
As we mentioned earlier, the positionstack API offers a free plan for some of its features. You can head over to the subscription page and select the Free subscription plan to get your API access key.
After successfully signing up, you can use core positionstack API endpoints by adding your access key to the URL:
|
1 2 3 4 5 6 |
http://api.positionstack.com/v1/reverse ? access_key = YOUR_ACCESS_KEY & query = 40.7638435,-73.9729691 |
By sending this request to the endpoint, you get an API response like this:
|
1 2 3 4 5 6 7 8 9 10 11 12 13 14 15 16 17 18 19 20 21 22 23 24 25 26 27 28 29 30 31 32 33 34 35 36 37 38 39 40 41 42 43 44 |
{ "data": [ { "latitude": 38.897675, "longitude": -77.036547, "type": "address", "name": "1600 Pennsylvania Avenue NW", "number": "1600", "postal_code": "20500", "street": "Pennsylvania Avenue NW", "confidence": 1, "region": "District of Columbia", "region_code": "DC", "county": "District of Columbia", "locality": "Washington", "administrative_area": null, "neighbourhood": "White House Grounds", "country": "United States", "country_code": "USA", "continent": "North America", "label": "1600 Pennsylvania Avenue NW, Washington, DC, USA" }, { "latitude": 38.897473, "longitude": -77.036548, "type": "address", "name": "1600 Pennsylvania Avenue Northwest", "number": "1600", "postal_code": "20500", "street": "Pennsylvania Avenue Northwest", "confidence": 1, "region": "District of Columbia", "region_code": "DC", "county": "District of Columbia", "locality": "Washington", "administrative_area": null, "neighbourhood": "White House Grounds", "country": "United States", "country_code": "USA", "continent": "North America", "label": "1600 Pennsylvania Avenue Northwest, Washington, DC, USA" } ] } |
Batch Requests with PositionStack API
Batch requests are a way of sending multiple forward or reverse geocoded queries to the API at once. While batch requests look very similar to regular geocoded requests, they require additional parameters.
It is easy to make a batch request. First, you need to specify the batch request parameter which, carries multiple queries. Here is a sample:
|
1 2 3 4 5 6 7 8 9 10 11 12 13 14 15 16 17 18 19 |
{ "batch":[ { "query": "Main Street", "country": "US", "region": "Minnesota" }, { "query": "Main Street", "country": "US", "region": "Illinois" }, { "query": "Main Street", "country": "US", "region": "Missouri" } ] } |
More on Advanced Features
If you have already made a request to the endpoint, you can see that each API response carries a map_url object. It contains a URL leading to an embeddable map associated with your geocoded result.
You can embed it using an iFrame element on your web or any other app.
|
1 |
"map_url": "http://map.positionstack.com/47.735549,-94.548447" |
Moreover, you can find other several features:
- Country Module – Returns an extensive set of country information along with both forward and reverse requests.
- Sun Module – Returns astrology data along with forward and reverse requests.
- Timezone Module – Returns timezone information along with forward and reverse requests.
- Bounding Box Module – Enable the Bounding Box by adding the bbox_module parameter to the URL
How to start a Node.js web app?
Before starting, you need to install Node.js
After that, create an empty folder and initialize a new Node.js project with these commands.


|
1 2 3 4 5 6 7 8 9 10 11 12 13 14 15 16 17 18 19 20 21 22 23 24 25 26 27 28 29 30 31 32 33 34 35 36 37 38 39 40 41 |
const express = require("express") const axios = require("axios") const app = express() const port = 1998 app.use(express.static('public')) app.use('/css', express.static(__dirname + 'public/css')) app.use('/img', express.static(__dirname + 'public/img')) app.use('/js', express.static(__dirname + 'public/js')) app.set('views', './src/views') app.set('view engine', 'ejs') app.get('/api/:version', function(req, res) { res.send(req.params.version); }); app.get("/geocoding", async function(req, res) { try { const API_ACC_KEY = "1ea2a2d4a6a80f98b92ea1129ad3a0b2"; const position = await axios.get( `http://api.positionstack.com/v1/forward?access_key=${API_ACC_KEY}&query=1600%20Pennsylvania%20Ave%20NW,%20Washington%20DC` ); res.render("positionstack", { info: position.data.data[0] }); } catch (error) { if (error.response) { console.log(error.response.data); } else if (error.request) { console.log(error.request); } else { console.log("Error", error.message); } } }); app.get('/', (req, res) => res.send('Index Page')) app.listen(port, () => console.log(`Running on ${port} port`)) |
|
1 2 3 4 5 6 7 8 9 10 11 12 13 14 15 16 17 18 19 20 21 22 23 24 25 26 27 28 29 30 31 32 33 |
<div class="card-body"> <form> <div class="row"> <div class="col"> <div class="mb-3"><label class="form-label" for="latitude"><strong>Latitude: <%- info.latitude %></strong></label></div> <div class="mb-3"><label class="form-label" for="number"><strong>Number: <%- info.number %></strong></label></div> </div> <div class="col"> <div class="mb-3"><label class="form-label" for="longitude"><strong>Longitude: <%- info.longitude %></strong><br></label></div> </div> <div class="col"> <div class="mb-3"><label class="form-label" for="type"><strong>Type: <%- info.type %></strong><br></label></div> </div> </div> <div class="row"> <div class="col"> <div class="mb-3"><label class="form-label" for="postal_code"><strong>Postal Code: <%- info.postal_code %></strong><br></label></div> </div> <div class="col"> <div class="mb-3"><label class="form-label" for="region"><strong>Region: <%- info.region %></strong><br></label></div> </div> </div> <div class="row"> <div class="col"> <div class="mb-3"><label class="form-label" for="country"><strong>Country: <%- info.country %></strong><br></label></div> </div> <div class="col"> <div class="mb-3"><label class="form-label" for="region_code"><strong>Region Code: <%- info.region_code %></strong><br></label></div> </div> </div> <div class="mb-3"></div> </form> </div> |
Now you can start the web app with this command:

You can find the source code here.
Conclusion
Geocoding is super useful for lots of businesses and groups. We’ve seen how geocoding helps with fair lending, tracking health issues, and even military data. PositionStack is a great tool to geocode your data. It covers addresses worldwide and can handle lots of requests every day.
With PositionStack, developers can quickly add geocoding to their apps. It’s easy to use and offers features like real-time coding and fair pricing. PositionStack makes geocoding simple, whether you need basic address conversion or more advanced location-based services. It’s a top choice for anyone who wants to use location data in their projects.
FAQs
1. What is geocoding?
It is turning addresses into map points, like changing “1600 Amphitheatre Parkway, Mountain View, CA” into a spot on a map.
2. How does geocoding work?
It works by taking an address and finding its exact place on a map using a special service or software.
3. What do people use geocoding for?
It helps in making maps, finding places, delivering things, and organizing location data in systems.
4. What are the challenges of geocoding?
It can be tricky because addresses can be different, maps need to be updated, and it can take a lot of resources for big jobs.
Be sure to head over and check out the PositionStack API right now!