

API integration is connecting and communicating with an API from your web application. You can call external API in WordPress in order to increase its functionality. When you integrate API into WordPress, you can extract and display external data, like social network feeds, weather reports, e-commerce product listings, and more. This can therefore build dynamic, interactive websites, improve user experience, and automate processes with this connection. This way, you can also use the extensive ecosystem of APIs available to add various capabilities to your WordPress site.
Table of Contents
What Is an API Call?
An API call refers to the request made by an application to an API endpoint to fetch data from an external source. It acts as a means of communication between various software programs.
API calls are essential to the process of getting data from outside sources. Applications can access and get data from a particular source according to a set of rules and protocols. Developers can ask an API endpoint for specific data by performing API calls. This endpoint serves as a gateway to the external system or service.
When using an API, the requested data retrieved usually are specified. The external API then processes the request. They will then retrieve the requested data, typically in a structured format like JSON.
Why Integrate APIs Into WordPress?
Some advantages of API integration in WordPress include the following.
- You may connect WordPress with other programs and services through APIs, like with a WordPress REST API plugin, which can increase your website’s flexibility and management. In order to track leads or publish material on social media, for instance, you may interface your website with a CRM system via an API.
- By reducing the amount of information accessible to the public, APIs can assist in increasing the security of your website. You could perhaps use an API in order to encrypt critical information or restrict access to specific areas of your website.
- Using APIs, you can give your users more dynamic and interesting experiences. You could utilize an API, for instance, to add a live chat function or to let visitors schedule appointments right on your website.
- You may automate processes on your website using APIs, which can help you save time and effort. An API might be used to automatically create data on website traffic or send out email notifications when there are new blog articles.
Getting Started With API Integration in WordPress
In this article, we will use Fixer API from APILayer, the API marketplace, to demonstrate the integration.
Prerequisites for Calling an API in WordPress
You should take a few important steps before integrating the Fixer API (or any other API) into your WordPress website.
Get an API key first from the Fixer API provider. This key functions as a special identification number, enabling you to authenticate your API queries. You can get an API key by creating an account on the official Fixer API website.
(You can subscribe to any Fixer plan through APILayer Marketplace or Fixer official website)

After registering, thoroughly read and comprehend the Fixer API’s documentation. The available endpoints, request forms, parameters, authentication procedures, and response structures are all covered in detail in the documentation. By becoming familiar with the documentation, you’ll have a solid idea of the API’s capabilities and how to interact with it. Here’s what the documentation looks like for Fixer API in APILayer.

Also, you might be wondering about the cost of APIs from APILayer. Here are the different pricing packages of Fixer API.

Creating a WordPress Plugin for API Integration
Developing a plugin for API integration in WordPress involves several key steps. Let’s walk through the process and use an example code snippet to illustrate each step.
- Register the plugin: By providing information such as the plugin name, description, author, and author URI, the register_plugin function registers the plugin with WordPress.
- Define the plugin: The API key setting is registered using the register_setting function via the api_integration_plugin_register_settings function, which is linked to the admin_init action. The api_key parameter will include the API key.
- Validate the API key: The api_integration_plugin_validate_api_key function validates the user-provided API key value. It checks to see if the value is empty but can expand to include specific validation logic.
- Add a settings page: Using the add_options_page function, the api_integration_plugin_add_settings_page function adds a settings page for the plugin. The title, menu label, access restrictions, and callback function (api_integration_plugin_render_settings_page) that will be used to render the page are all specified.
- Render the settings page: The api_integration_plugin_render_settings_page function displays the settings page HTML. Using get_option, it obtains the API key from the api_key option and displays it in an input field. The user hits the “Save Changes” button, which submits the form to options.php and saves the settings.
- Make a call to the API: The API call is made by the api_integration_plugin_make_api_call function, which is attached to the init action. It creates the API URL and gets the API key from the api_key argument. The API request is then made using wp_remote_get, and the response is saved. If the response is successful, logic is used to manage and process the API data, and the response body is decoded using json_decode. According to the unique requirements of the integration, this logic can be modified.
Code Example
The following code demonstrates a sample code snippet for creating a WordPress plugin for API integration. This code should be added to a PHP file within your WordPress plugin directory. You can create a new PHP file with any name you want such as api-integation-plugin.php and save it after adding the following code.
|
1 2 3 4 5 6 7 8 9 10 11 12 13 14 15 16 17 18 19 20 21 22 23 24 25 26 27 28 29 30 31 32 33 34 35 36 37 38 39 40 41 42 43 44 45 46 47 48 49 50 51 52 53 54 55 56 57 58 59 60 61 62 63 64 65 66 67 68 69 70 71 72 73 74 75 76 77 78 79 80 81 82 83 84 85 86 87 88 89 90 91 92 93 94 95 96 97 98 99 100 101 102 103 104 105 106 107 108 109 110 111 112 113 114 115 116 117 118 119 120 121 122 123 124 125 126 127 128 129 130 131 132 133 134 135 136 137 138 139 140 141 142 143 144 145 146 147 148 149 150 151 152 153 154 155 156 157 158 159 160 161 162 163 164 165 166 167 168 169 170 171 172 173 174 175 176 177 178 |
<?php /** * Plugin Name: API Integration Plugin * Description: This is how a WordPress REST API works. * Author: APILayer * Author URI: https://apilayer.com */ // Register the plugin. register_plugin( 'api-integration-plugin', FILE, [ 'Version' => '1.0.0', 'Author' => 'APILayer', 'Author URI' => 'https://apilayer.com', ] ); // Define the plugin's settings. add_action( 'admin_init', 'api_integration_plugin_register_settings' ); function api_integration_plugin_register_settings() { // Register the API key setting. register_setting( 'api_integration_plugin', 'api_key', 'api_integration_plugin_validate_api_key' ); } // Validate the API key. function api_integration_plugin_validate_api_key( $value ) { // Check if the value is empty. if ( empty( $value ) ) { return ''; } // Check if the value is valid. return $value; } // Add a settings page. add_action( 'admin_menu', 'api_integration_plugin_add_settings_page' ); function api_integration_plugin_add_settings_page() { // Add the settings page. add_options_page( 'API Integration Plugin Settings', 'API Integration', 'manage_options', 'api-integration-plugin', 'api_integration_plugin_render_settings_page' ); } // Render the settings page. function api_integration_plugin_render_settings_page() { // Get the API key. $api_key = get_option( 'api_key' ); ?> <div class="wrap"> <h2>API Integration Plugin Settings</h2> <form action="options.php" method="post"> <?php settings_fields( 'api_integration_plugin' ); ?> <input type="text" name="api_key" value="<?php echo esc_attr( $api_key ); ?>" /> <input type="submit" name="submit" value="Save Changes" class="button button-primary" /> </form> </div> <?php } // This is how to make an API call add_action( 'init', 'api_integration_plugin_make_api_call' ); function api_integration_plugin_make_api_call() { // Get the API key. $api_key = get_option( 'api_key' ); // Make a call to the API. $url = 'https://api.example.com/v1/?access_key=' . $api_key; $response = wp_remote_get( $url ); // Check if the response was successful. if ( is_wp_error( $response ) ) { // Handle the error. } else { // Get the WordPress data that is returned. $data = json_decode( $response['body'] ); // Implement something with the data } |
Now convert it to a zip file, upload it to your WordPress site, and activate it.

Customizing the Plugin for Your API
To customize the plugin for your specific requirements with the Fixer API, follow these steps and modify the code snippets accordingly.
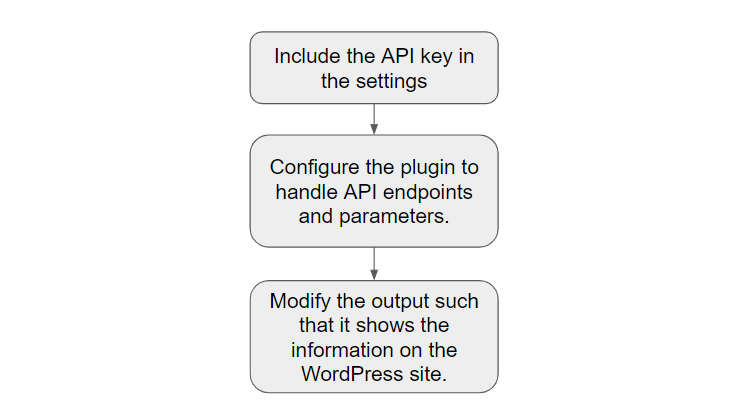
Include the API key in the plugin settings.
Locate the plugin code for the api_integration_plugin_register_settings function. Within this function, update the register_setting method to include the unique API key parameter required by your API. For example, if you’re using the Fixer API, you can add the api_key parameter to the register_setting function like this.
|
1 2 3 4 5 6 7 8 9 |
register_setting( 'api_integration_plugin', 'api_key', array( 'type' => 'string', 'description' => 'Fixer API Key', 'sanitize_callback' => 'sanitize_text_field' ) ); |
Collecting the API key from the user
In the api_integration_plugin_render_settings_page function, modify the corresponding input box to collect the API key from the user. Update the HTML input field to include the necessary form elements and attributes.
|
1 |
<input type="text" name="api_key" value="<?php echo esc_attr( $api_key ); ?>" placeholder="Enter your Fixer API key" /> |
Configuring the plugin for API endpoints and parameters
Identify the REST API endpoints and parameters required by the Fixer API. Make the necessary changes to the api_integration_plugin_make_api_call function. Modify the $url variable to include the specific API endpoint and parameter values. For example, if you need to perform currency conversions, you might need to specify the base currency and the desired currency in the API URL. Here’s an example.
|
1 |
$url = 'https://data.fixerapi.com/v1/convert?access_key=' . $api_key . '&from=USD&to=EUR'; |
Modifying the output to display relevant information
Review the api_integration_plugin_make_api_call function. Inspect the data retrieved from the API, which is stored in the $data variable. Choose the specific data elements you want to display on your WordPress website. Customize the code following the ‘// Implement something with the data’ comment to format and present the relevant information. This may involve creating HTML output, integrating the data into widgets or shortcodes, or incorporating it into existing WordPress templates.
|
1 2 3 4 5 |
// Format and display the conversion rate. if ($data && isset($data->result)) { $conversion_rate = $data->result; echo 'The conversion rate from USD to EUR is: ' . $conversion_rate; } |
By following these steps and modifying the code snippets accordingly, you can customize the plugin to effectively integrate the Fixer API into your WordPress website.
Integrating the Plugin into WordPress
You can use this plugin as a widget and use it in a suitable location of your website. Here is how you do it.
First, log in to your WordPress Admin Area. Then, click on the widgets tab on the Appearance menu.

In the Widgets section, find the plugin widget.

Once you add the plugin widget in the widget area, you can configure the widget settings. The widget settings will vary depending on the plugin. In our FIxer API integration widget, you can select certain currency pairs to be displayed.

Testing and Troubleshooting the API Integration
Debugging and troubleshooting become crucial throughout the testing stage. Additionally, pay particular attention to any sudden failures, alerts, or discrepancies that appear while integrating APIs. Moreover, enable WordPress’ debugging mode to collect thorough error information that can be helpful in locating and fixing problems. Furthermore, review server logs and error logs frequently to find any API-related issues or patterns that may need to be addressed.
In order to protect your API integration, it is essential to address any REST API authentication and security issues. Firstly, consider implementing authentication methods like API keys or tokens, which are frequently used in API integrations. Moreover, ensure that your plugin adheres to best practices for data security and securely keeps and manages these credentials. Additionally, implement security measures to protect sensitive data transferred between your WordPress site and the API. These measures may include using secure HTTPS connections, performing appropriate validation, and sanitization of user input.
Conclusion
This article has offered a thorough explanation of how to integrate an API in WordPress using a plugin. Obtaining an API key for the API you want, becoming familiar with the API documentation, and developing a WordPress API plugin specifically for API integration are some of the important topics we went through. We talked about creating the API endpoints and parameters, customizing the output in order to display relevant information on your WordPress site, and configuring the plugin to your particular API requirements.
Visit APILayer, an API Marketplace, to get access to a variety of APIs, such as the Fixer API described in this article.

FAQs
Can I Call an External API in WordPress?
You can mainly use the WordPress plugin option (described in this article) or themes option to integrate and call external APIs in WordPress.
How to Call an API in WordPress?
One of the two main ways to call an API in WordPress is by developing a plugin for WordPress that manages API requests and responses. Another way is the themes option.
Do I Need an API Key to Call an External API in WordPress?
The majority of APIs demand an API key for purposes of authentication while making API requests.
Can I Customize the API Output in WordPress?
You can alter the data that you retrieve and display in WordPress in order to suit your needs.