

APIs (Application Programming Interfaces) are interfaces that allow software applications to communicate with each other. These interfaces mainly enable data exchange between different systems and interoperability of applications. With developing technology, the importance of API integration has also increased. APIs, which enable data sharing and integration, especially between web-based applications, are widely used in many sectors. In recent years, integrating API into WordPress has gained great popularity among web developers.
Integration of APIs into platforms like WordPress allows users to make their websites more functional. For example, an e-commerce site owner can integrate a payment API into their WordPress site to manage payment transactions. Thanks to this integration, customers’ payments can be processed securely and the transaction process becomes more user-friendly. Therefore, integration of APIs into platforms like WordPress improves user experience while also helping businesses run more efficiently and effectively. In this article, we will take a closer look at API integration into the WordPress platform.
Table of Contents
What’s the Difference Between Theme and Plugin API Integration in WordPress?
There are two main ways of integrating APIs in WordPress. One is by Themes and the other by Plugins. Each of these ways has its pros and cons.
Themes, for instance, provide you with a flexible means of customizing the design and layout of your WordPress site. They offer a variety of templates and styles from which to choose. You must modify the theme files to integrate API calls and display the necessary material to implement the API call integration via a theme. This method has its advantages. For example, they are quite simple since it has very few steps as opposed to creating a WordPress REST API plugin from scratch.
This article will focus primarily only on how you can integrate APIs through Themes.
Step-By-Step Guide to Integrating an External API Into WordPress
This step-by-step guide will go through how you can integrate your external API into WordPress. But first, you have to choose an API. This article will demonstrate using the currencylayer API from the APILayer. Access to historical and current exchange rates for different currencies is made possible via the currencylayer API. Developers can access precise and recent exchange rates for a variety of global currencies.
Learn how to integrate and call an API from WordPress (in a Plugin).
1. Obtain an API Key for the External API
Like it is for all APIs, we should get an API key for the currencylayer API as well. This key will be a unique identifier that gives access to API data endpoints.
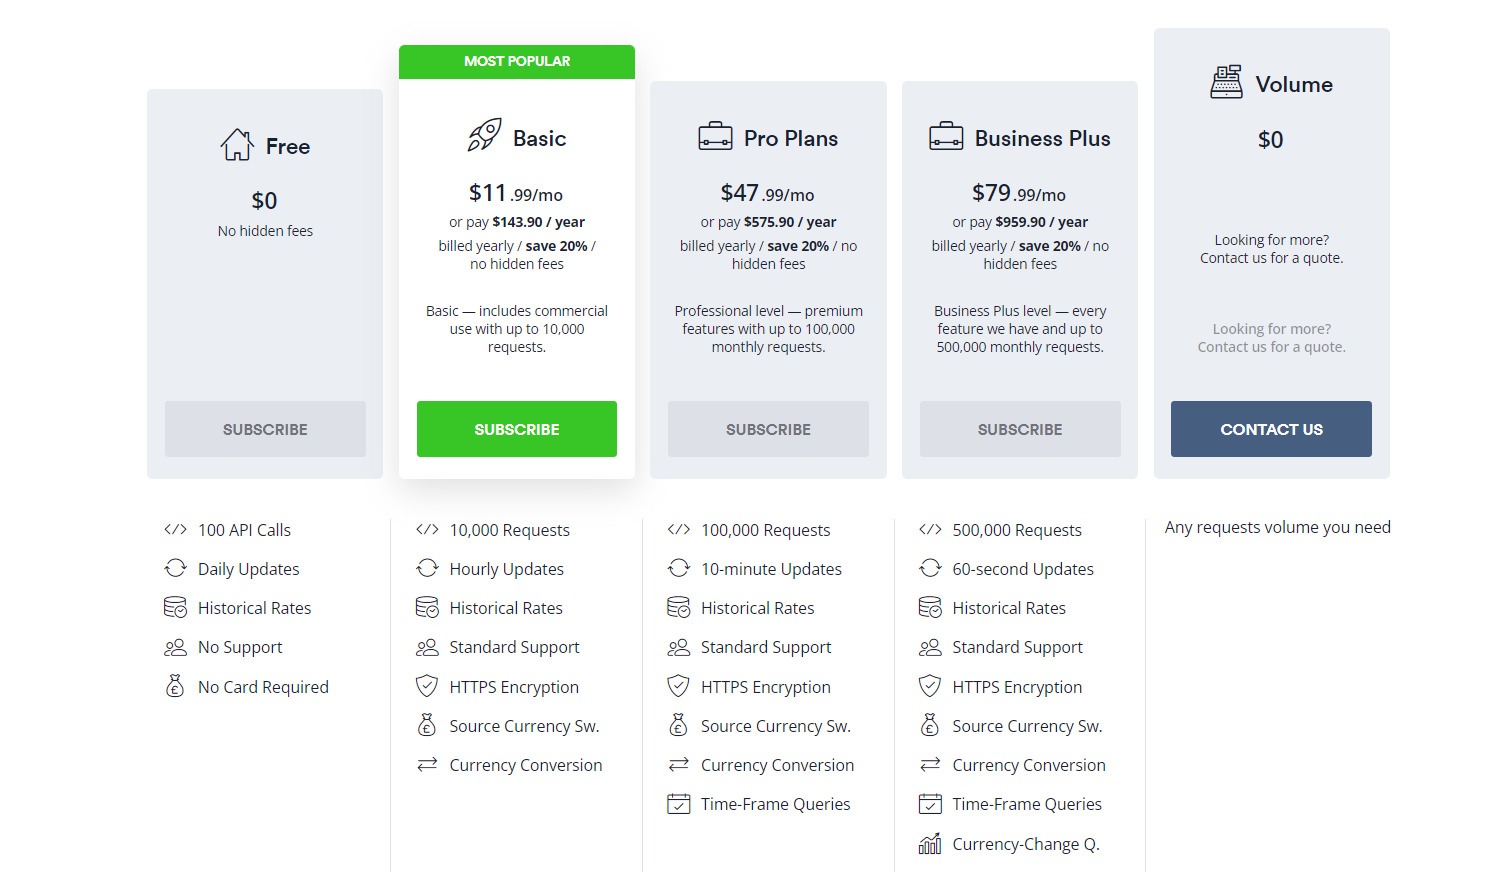
First, sign up for an account in currencylayer. You can subscribe to the free version for 100 API calls.

You will then get access to a free API key in your dashboard.
Use your key and append it to a base URL. The following URL is an example to get live currency rates.
|
1 |
https://api.currencylayer.com/live?access_key=YOUR_ACCESS_KEY |
2. Create a Child Theme
Using a child theme is of utmost importance when it comes to maintaining the integrity and flexibility of your WordPress website. It acts as a safeguarding layer that allows you to make customizations without altering the original parent theme. The significance of using a child theme can be attributed to several key factors.
Firstly, a child theme ensures that any modifications you make to your website won’t be lost when the parent theme is updated. It acts as a protective shield, preserving your customizations and preventing them from being overwritten. This way, you can confidently update the parent theme without the fear of losing your changes.
Furthermore, a child theme grants you the freedom to customize various aspects of your website, including design, layout, and functionality. It empowers you to make changes without any limitations imposed by the parent theme. With a child theme, you have complete control over the customization process.
Before we create the child theme, make sure you have properly hosted your WordPress site.
Steps to Create a Child Theme
Go to your WordPress theme directory. You can usually find this directory when you navigate into the wp-content directory and then into themes.

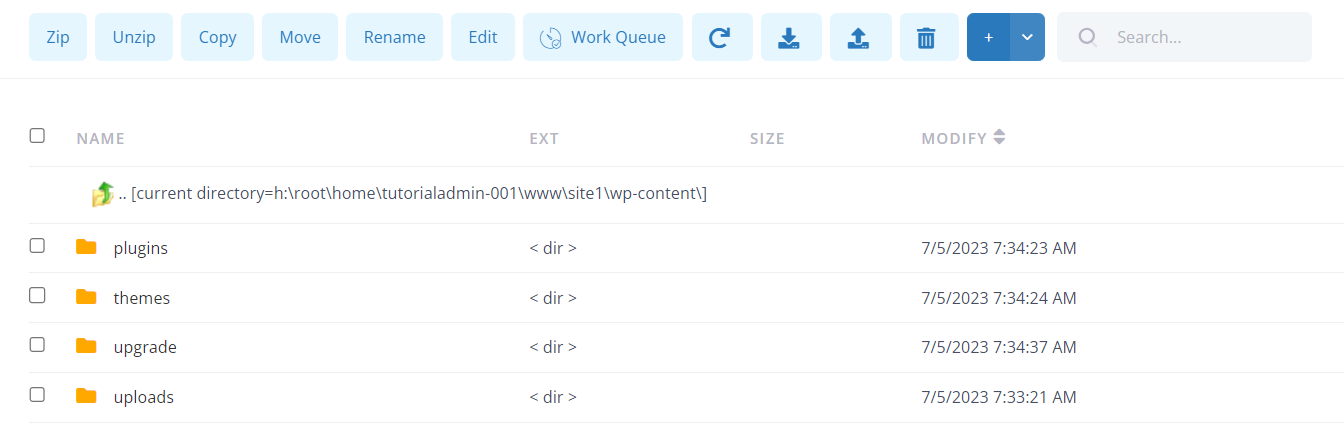
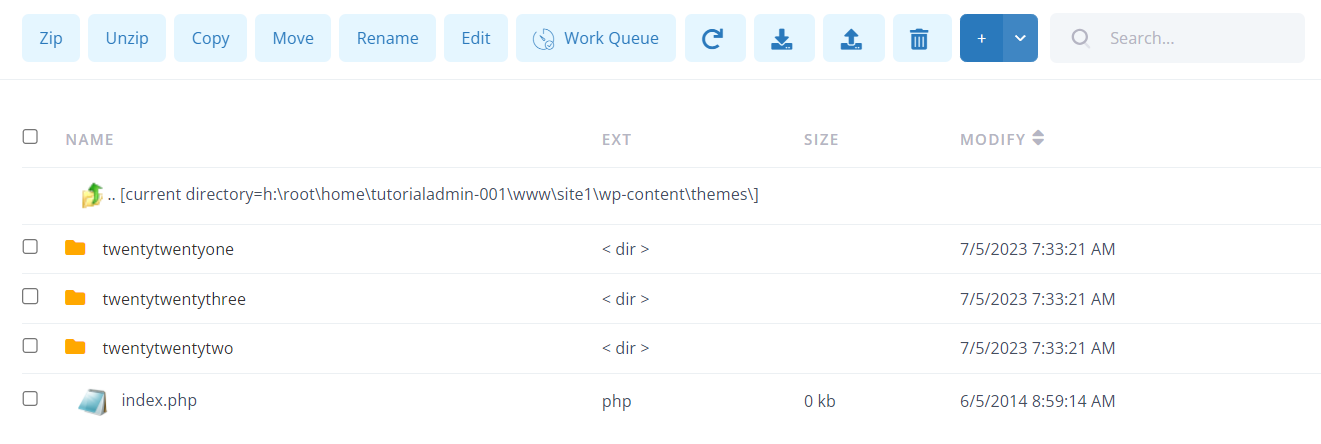
If you notice a theme folder already inside (which usually is the case) like the one in the image above, create another folder in that same directory. You can name this with a “child” prefix to the existing theme folder, eg. “twentytwentyone-child”.

Now, in this child theme folder, create a file (not a folder) with the name style.css. In this file, you can add the following code.
|
1 2 3 4 5 6 7 |
/* Theme Name: Twenty Twenty One Child Template: twentytwentyone */ |
You should also make sure the “twentytwentyone” in the Template matches with the parent theme folder.

To make sure the stylesheet is usable, we need to enqueue it. We can do so by creating another file alongside the style.css file with the name “functions.php” and adding the following.
|
1 2 3 4 5 6 7 8 9 |
<?php add_action( 'wp_enqueue_scripts', 'twentytwentyone_enqueue_child_theme_styles' ); function twentytwentyone_enqueue_child_theme_styles() { wp_enqueue_style( 'child-style', get_stylesheet_uri() ); } |
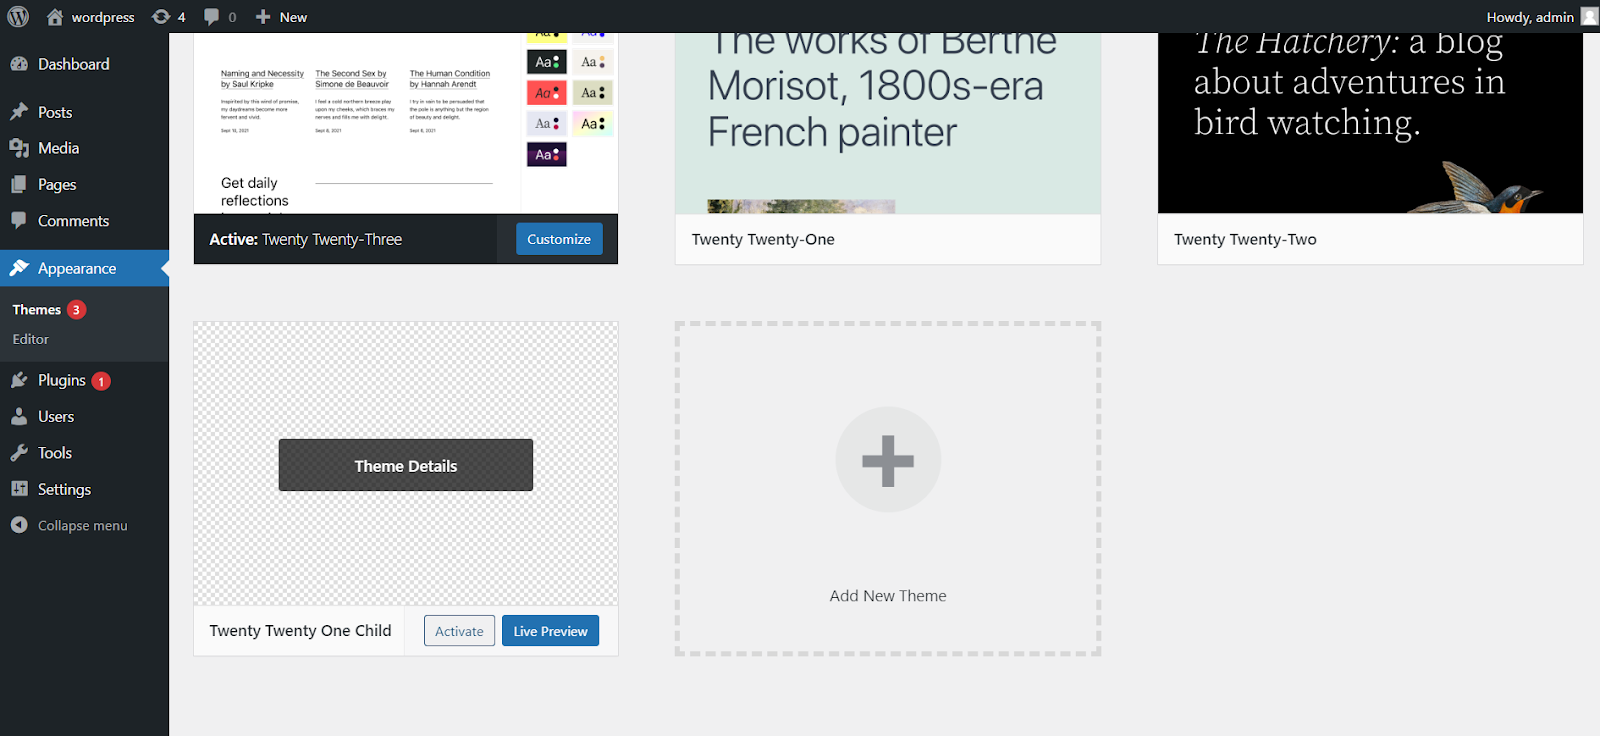
Now to activate this theme, go to your WordPress admin area and navigate into Appearance and Themes.
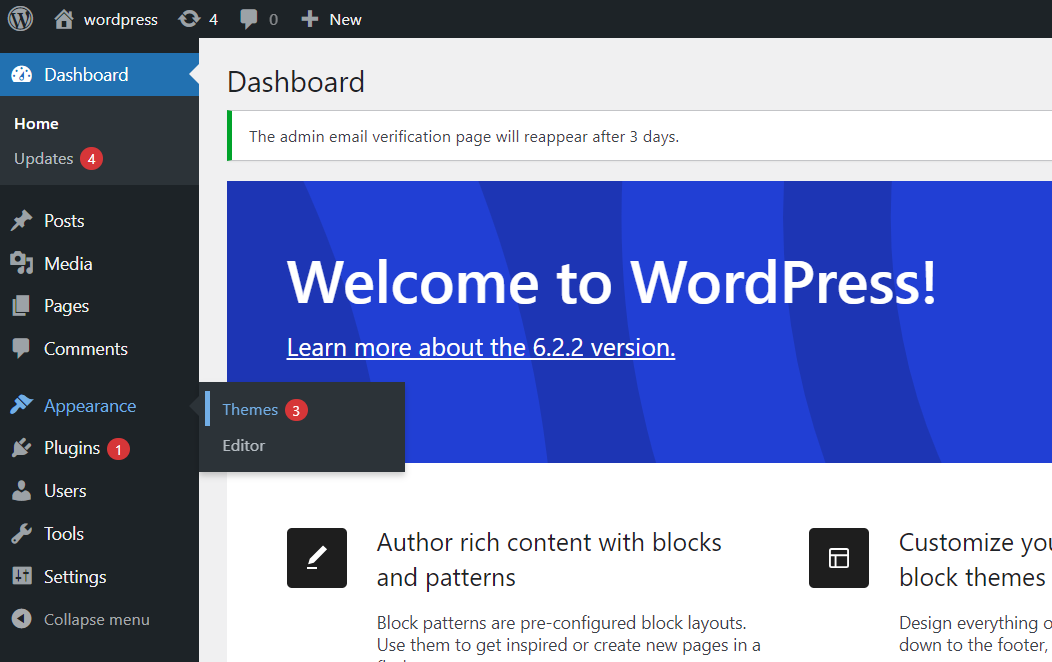
You will be able to see the theme you created previously on your screen. You can now click on “Activate”.
3. Create a Custom Page Template and Integrate the API
We created a theme, and now we will be using a custom page template so that it structures your webpage in a way that integrates your API request data appropriately.
Discover the top free public API options for developers by APILayer!
To get started, create another file with the name “custom-api.php” under your child theme directory. Paste the following code but make sure to replace the access key appropriately.
|
1 2 3 4 5 6 7 8 9 10 11 12 13 14 15 16 17 18 19 20 21 22 23 24 25 26 27 28 29 30 31 32 33 34 35 36 37 38 39 40 41 42 43 44 45 46 47 48 49 50 51 52 53 54 55 56 57 58 59 60 61 62 63 64 65 66 67 68 69 70 71 72 73 74 75 76 77 78 79 80 81 82 83 84 85 86 87 88 89 90 91 92 93 94 95 96 97 98 99 |
<?php /* Template Name: Currency Exchange Rates Description: This is a custom page template that integrates with the Currency Layer WordPress API to display real-time exchange rates. */ // Show the header of your WordPress site so the page does not look out of place get_header(); ?> <div id="primary" class="content-area"> <main id="main" class="site-main"> <?php // set REST API Endpoint and access key $endpoint = 'live'; $access_key = 'ACCESS-KEY'; // Initialize CURL: $ch = curl_init('http://api.currencylayer.com/'.$endpoint.'?access_key='.$access_key.''); curl_setopt($ch, CURLOPT_RETURNTRANSFER, true); // Store the data: $json = curl_exec($ch); curl_close($ch); // Decode JSON response: $exchangeRates = json_decode($json, true); if (isset($exchangeRates['success']) && $exchangeRates['success'] === true) { // Access the exchange rate values: $usdToGbp = $exchangeRates['quotes']['USDGBP']; $usdToEur = $exchangeRates['quotes']['USDEUR']; // Create HTML to display the exchange rates: $pageHTML = "<h2>Real-time Exchange Rates</h2>"; $pageHTML .= "<p>USD to GBP: $usdToGbp</p>"; $pageHTML .= "<p>USD to EUR: $usdToEur</p>"; echo $pageHTML; } else { // Show the specific error message: if (isset($exchangeRates['error'])) { echo "Error: " . $exchangeRates['error']['info']; } else { echo "Oops, something went wrong. Please try again later."; } } ?> </main><!-- #main --> </div><!-- #primary --> <?php // Show the footer of the WordPress site to keep the page in context get_footer(); |
The following image shows you how the above code appears on the file.

4. Add a New Page Using Your New Page Template
If you now go to your WordPress admin area again, you will find an “Add New” option.
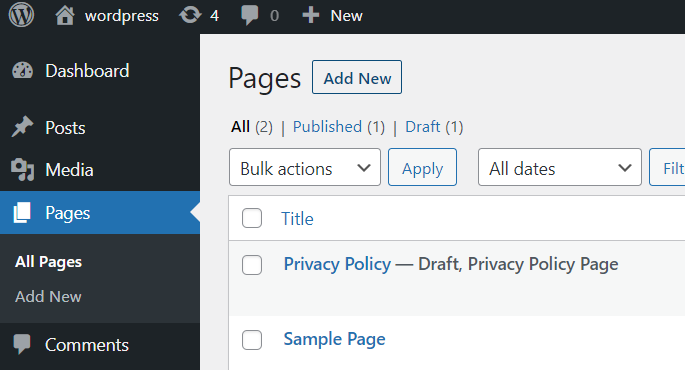
You will now see a screen where you can find the custom page you created from a template option’s drop-down menu. Select the “Currency Exchange Rates” option.

Now you are done! You have now integrated your currency exchange rates WordPress REST API into your WordPress site.

Top Use Cases for Integration an API into WordPress
API integrations to WordPress are frequently preferred by both developers and businesses lately. Many successful use cases arise from this situation that improve business processes. In this section, we will cover some popular use cases of this.
Explore how to add a currency converter to your WordPress website!
E-commerce Integration
API integration is of great importance for e-commerce sites. For example, by integrating a payment provider API into WordPress, you can enable users to pay securely and quickly through the site. Likewise, APIs can be used for e-commerce operations such as inventory management or order tracking. This use case is one of the benefits of API integration.
Social Media Integration
Integrating your WordPress site with social media platforms is important to deliver your content to a wider audience. Thanks to social media API endpoints, you can automatically share your posts, interact with your social media followers, and increase your site traffic.
CRM Integration
Integrating customer relationship management (CRM) systems into WordPress allows you to manage customer data more effectively. For example, by integrating a customer’s interactions and purchase history on your WordPress site into the CRM systemn with an API, you can deliver a more personalized experience.
Data Analysis Integration
You can integrate analytics tools into WordPress via APIs to analyze your website’s performance and make data-driven decisions. Integration with tools like Google Analytics can help you better understand site traffic, user behavior, and conversions.
Conclusion
As a result, integrating API into WordPress is critical for businesses and web developers in today’s digital world. Thanks to API integration, time-consuming and error-prone processes such as manual data entry can be eliminated. Additionally, resources such as API integration tools and API documentation stand out as resources that directly facilitate integration processes. In this way, API integration is increasingly important and plays a key role in increasing the efficiency of businesses, ensuring data security, and improving user experience. By integrating APIs into popular content management systems like WordPress, businesses can create a more competitive and user-focused online presence.
FAQs
Q: What are the best practices for WordPress API integration?
A: Best practices for WordPress API (Application Programming Interface) integration include regular security, performance, and data updates. For security purposes, it is important that API keys and authentication information are stored securely and kept up to date. In terms of performance, reducing unnecessary API calls and caching data can improve performance. Additionally, having API documentation that is well-understood and up-to-date makes the integration process easier.
Q: What are API integration platforms and why are they preferred?
A: API integration platforms are tools that make it easy to exchange data between different systems. An API integration platform generally provides management, documentation, testing, and monitoring of APIs. Additionally, it allows managing the integration of different APIs from a single place.
Q: Can I integrate multiple APIs into my WordPress website?
A: Yes, you can integrate multiple APIs into your WordPress website. The flexible structure of WordPress allows you to easily integrate different APIs. For example, you can simultaneously use a payment API for payment processing, a location API for mapping, and a social media API for social media integration.
Q: What are the advantages of integrating web services into WordPress?
A: There are many advantages to integrating web services into WordPress. Thanks to this integration, you can exchange data between different systems, create customized content, and increase user experience. Additionally, with up-to-date data usage and automatic updates, you can increase the efficiency of your site and reduce errors caused by manual data entry.
